*This post contains affiliate links and may earn commissions on recommended products. As an Amazon Associate, I earn from qualifying purchases.


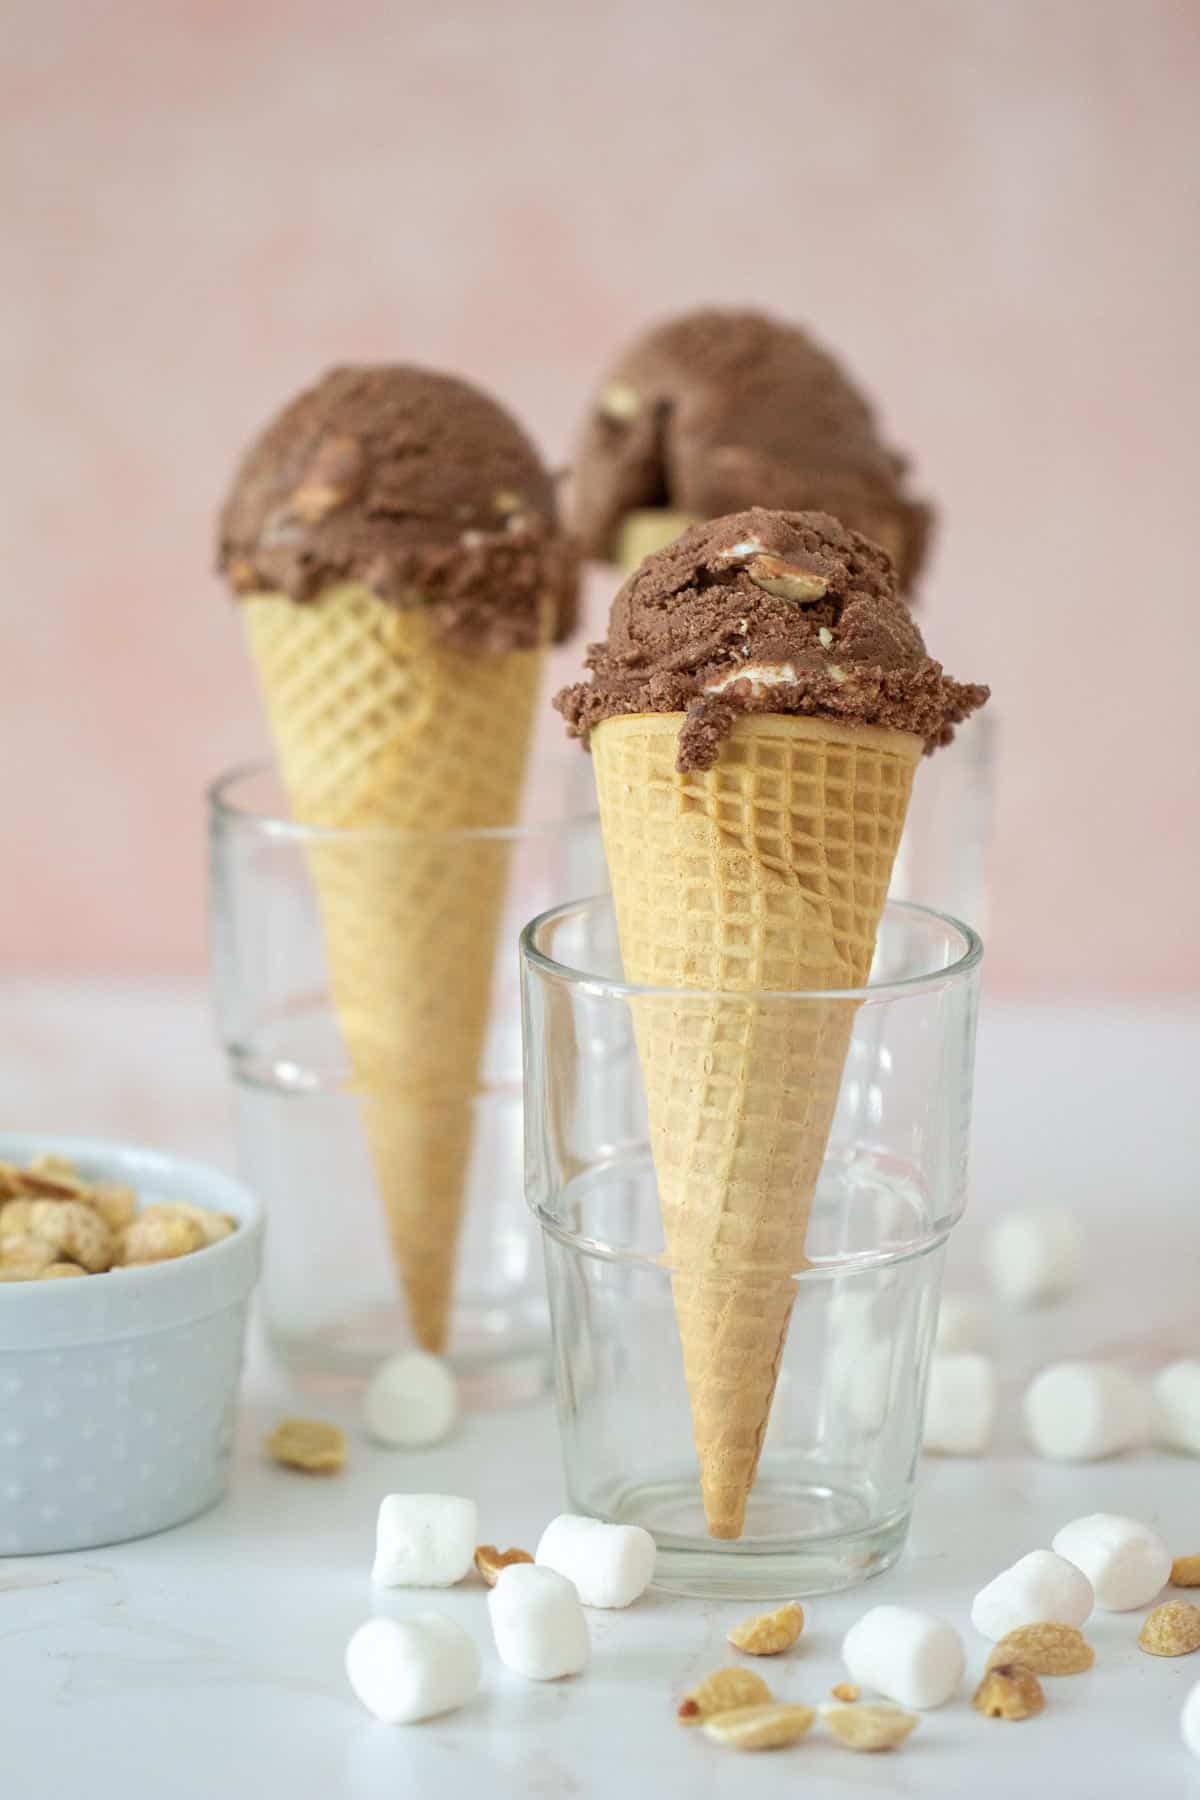
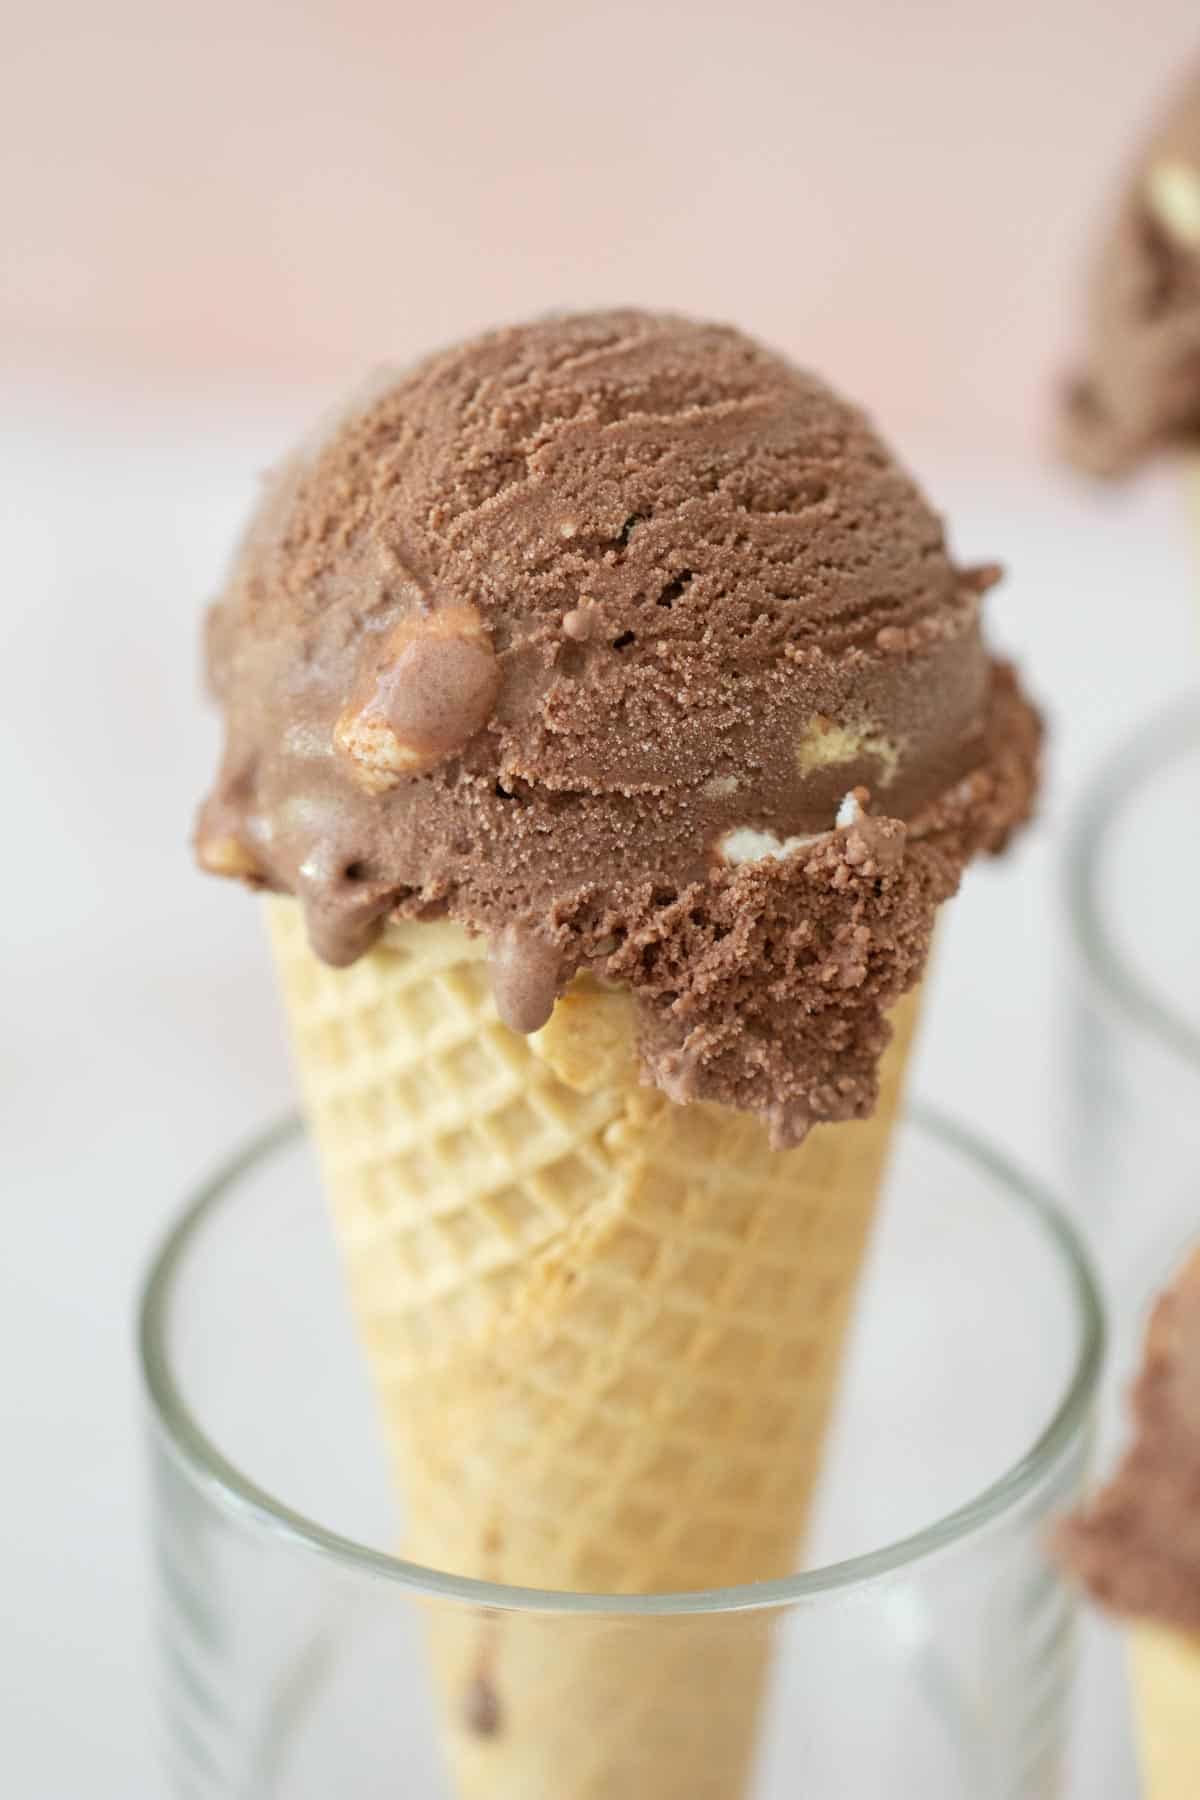
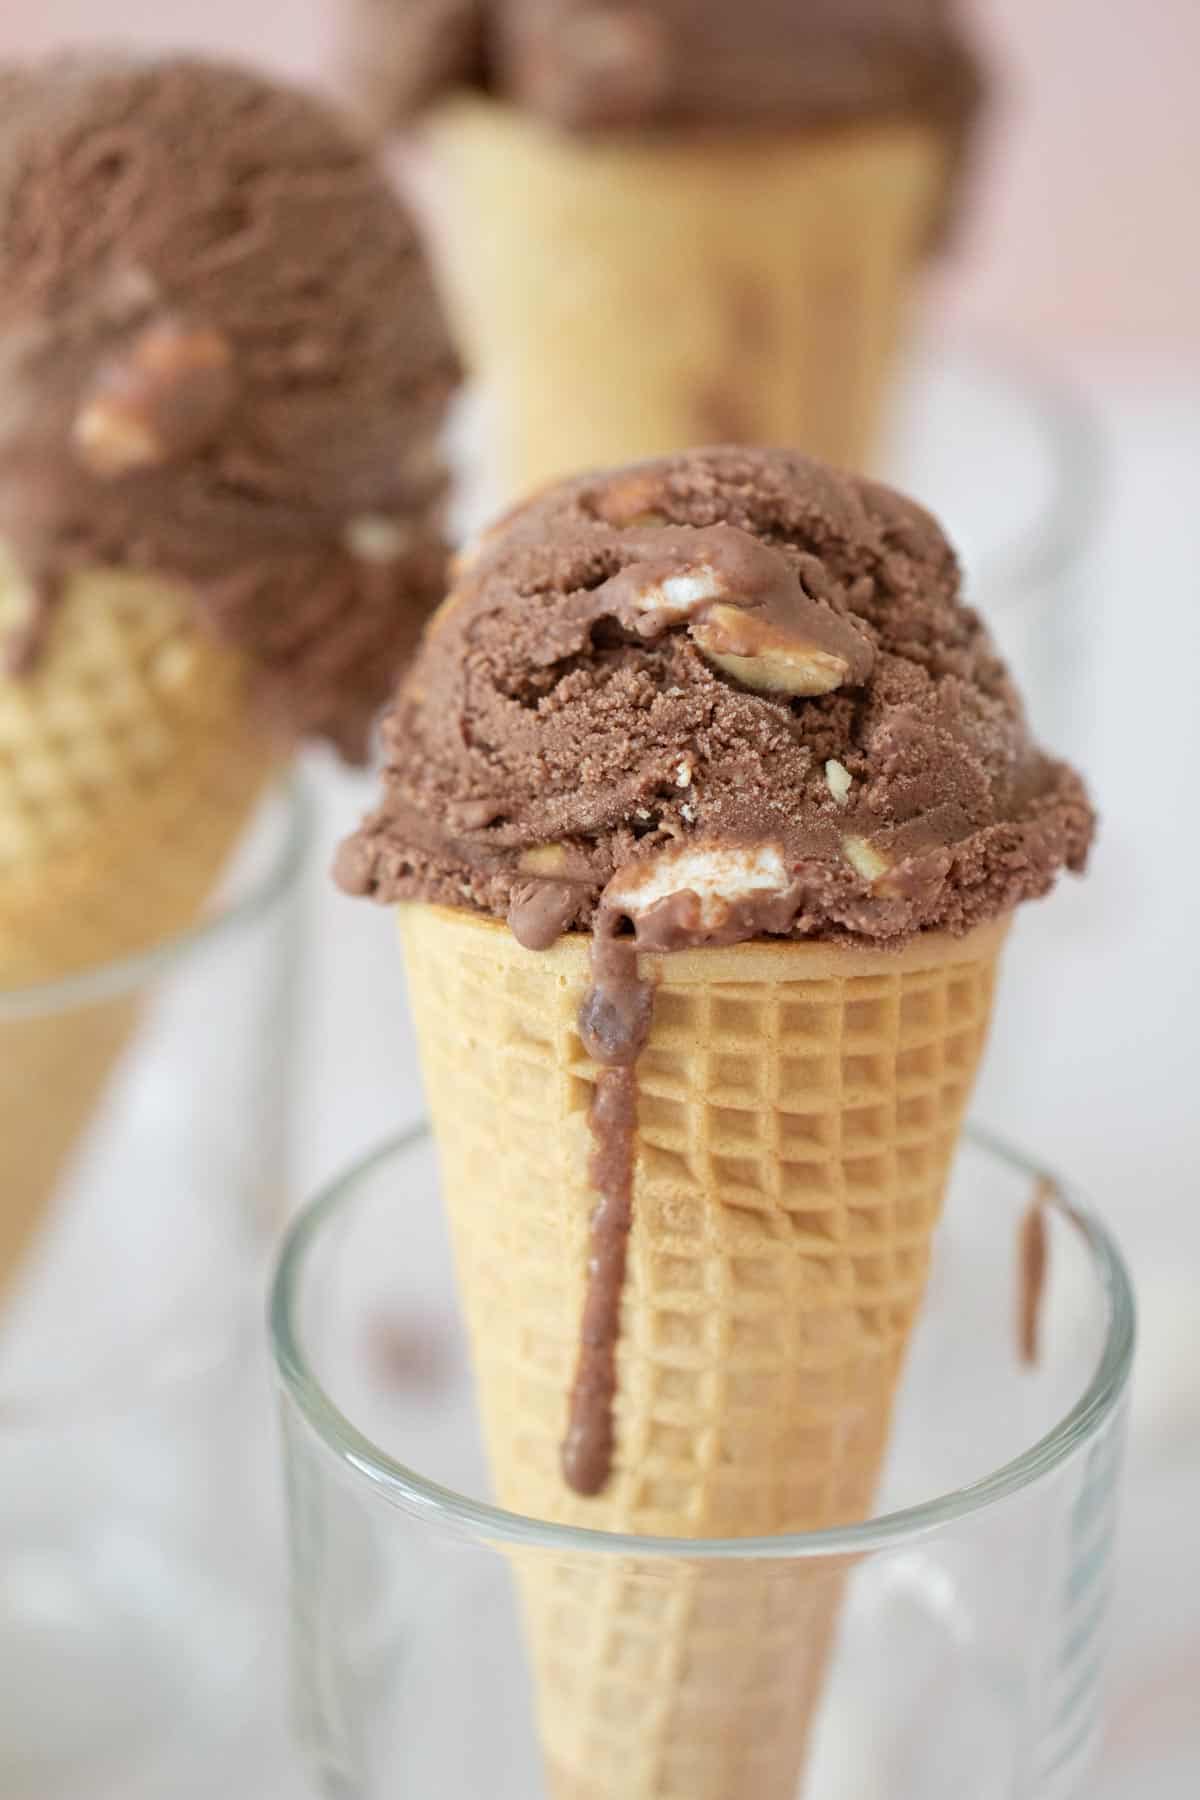
Rocky road ice cream is loaded with marshmallows and nuts, nestled in a dreamy chocolate base! It’s the perfect summertime treat.
My kids are always clamoring for ice cream, no matter the season. Lucky for them I love making it, so it’s a rare day we don’t have a batch in the freezer.
The latest batch is this fantastic rocky road ice cream. I don’t buy rocky road, but making it at home has turned it into a family favorite!
It starts with a smooth, egg-free chocolate custard and is finished off with the addition of marshmallows and peanuts.
If you love chocolate ice cream or ice cream with tons of packed-in flavor like cookie monster ice cream, you’ll want to give this one a try!
What is rocky road ice cream?
There are varying stories about how rocky road ice cream was invented in the United States.
It is derived from the rocky road candy that originated in Australia, which features milk chocolate, nuts, marshmallows, and other ingredients such as coconut.
The ice cream was reportedly invented by William Dreyer in 1929 and was given the name “rocky road” after the stock market crash to bring a smile to customers during the Great Depression.
In the early days the ice cream was hard to produce due to the addition of the mix-ins, but thanks to electric ice cream machines it’s easy to do at home!
Rocky road is also used in other recipes besides ice cream, including rocky road sheet cake.

How to make rocky road ice cream
Before you can make ice cream, place the canister of your ice cream maker in the freezer for at least overnight, or until completely frozen.
I usually put mine in the freezer the day before I want to make ice cream. If it isn’t cold enough, the ice cream won’t churn properly.
Keep it frozen while you prepare the custard.
Gather your ingredients:
- Heavy cream (also labeled as heavy whipping cream)
- Cocoa powder, preferably Dutch process
- Granulated sugar
- Semisweet or bittersweet chocolate, broken into pieces
- Milk (I use 2% but you can use whole if you like; I don’t recommend skim for ice cream)
- Pure vanilla extract *
- Salt
You’ll also need mini marshmallows and peanuts, but not until later.
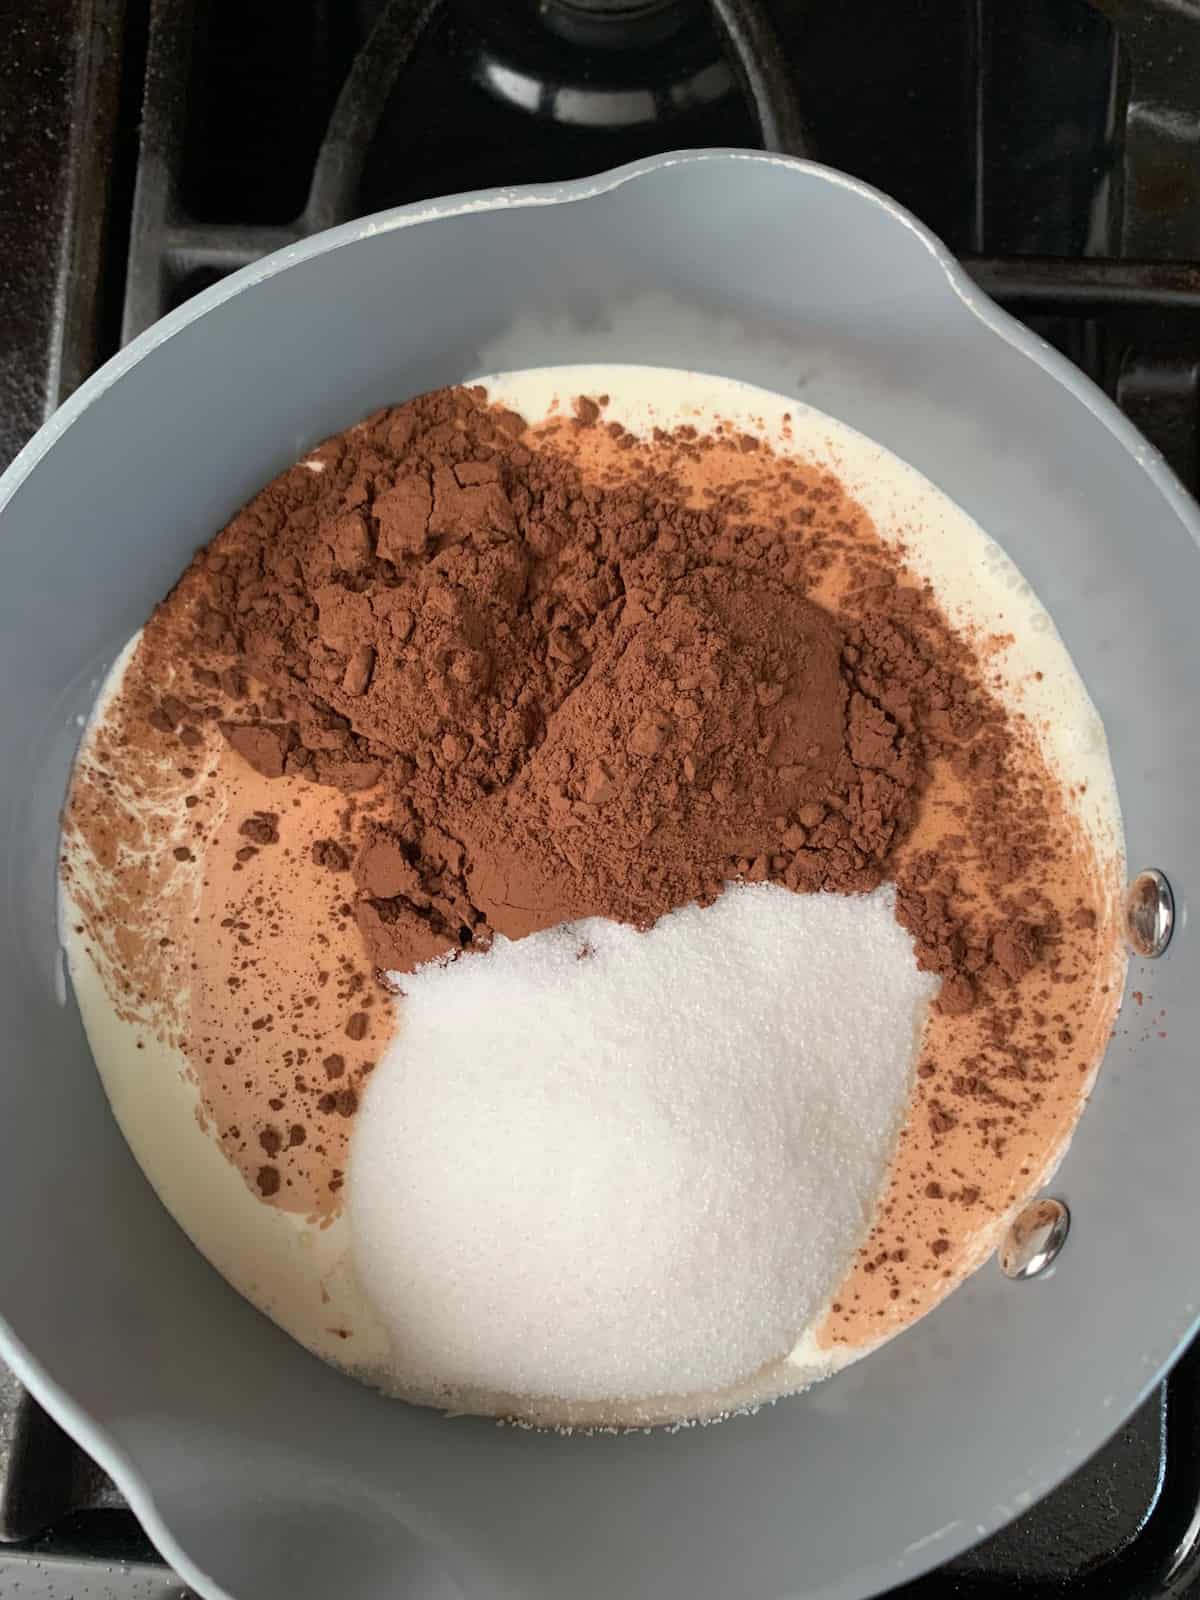
In a saucepan, combine cream, cocoa powder *, and sugar. Bring to a gentle boil, whisking to melt sugar and combine ingredients.
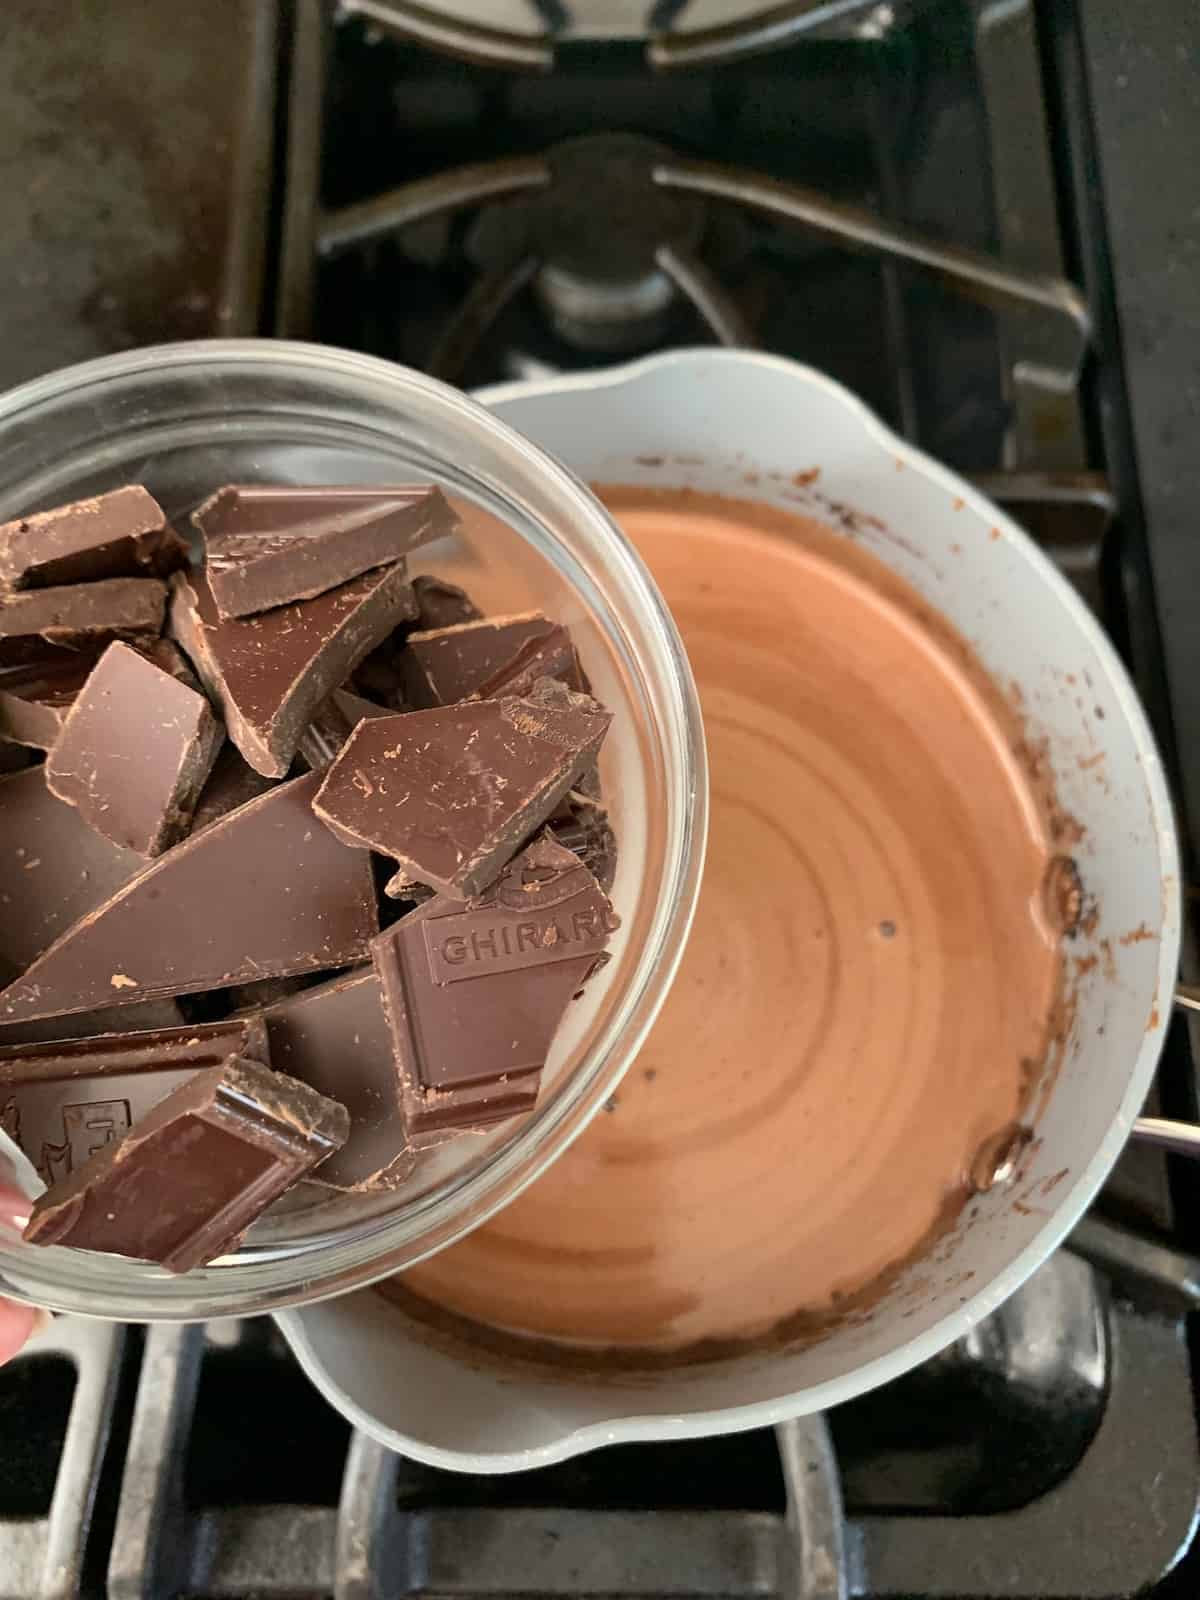
Once boiling, remove from heat and whisk in chocolate to melt completely.
If needed or desired, transfer the mixture to another container for the refrigerator. Keep whisking while you add the milk, vanilla, and salt. The mixture should be uniform in color with only a few (if any) flecks of chocolate)
Want to save this recipe for later?
To ensure a perfectly smooth ice cream, pour the ice cream mixture into a blender and blend for 30 seconds before chilling.
Cover the ice cream mixture and place in the refrigerator for a minimum of 2 hours to chill completely.
You can make this in advance and churn when you’re ready. I like to make the ice cream base at night and then churn it the next day, so we have fresh ice cream ready for an afternoon snack!
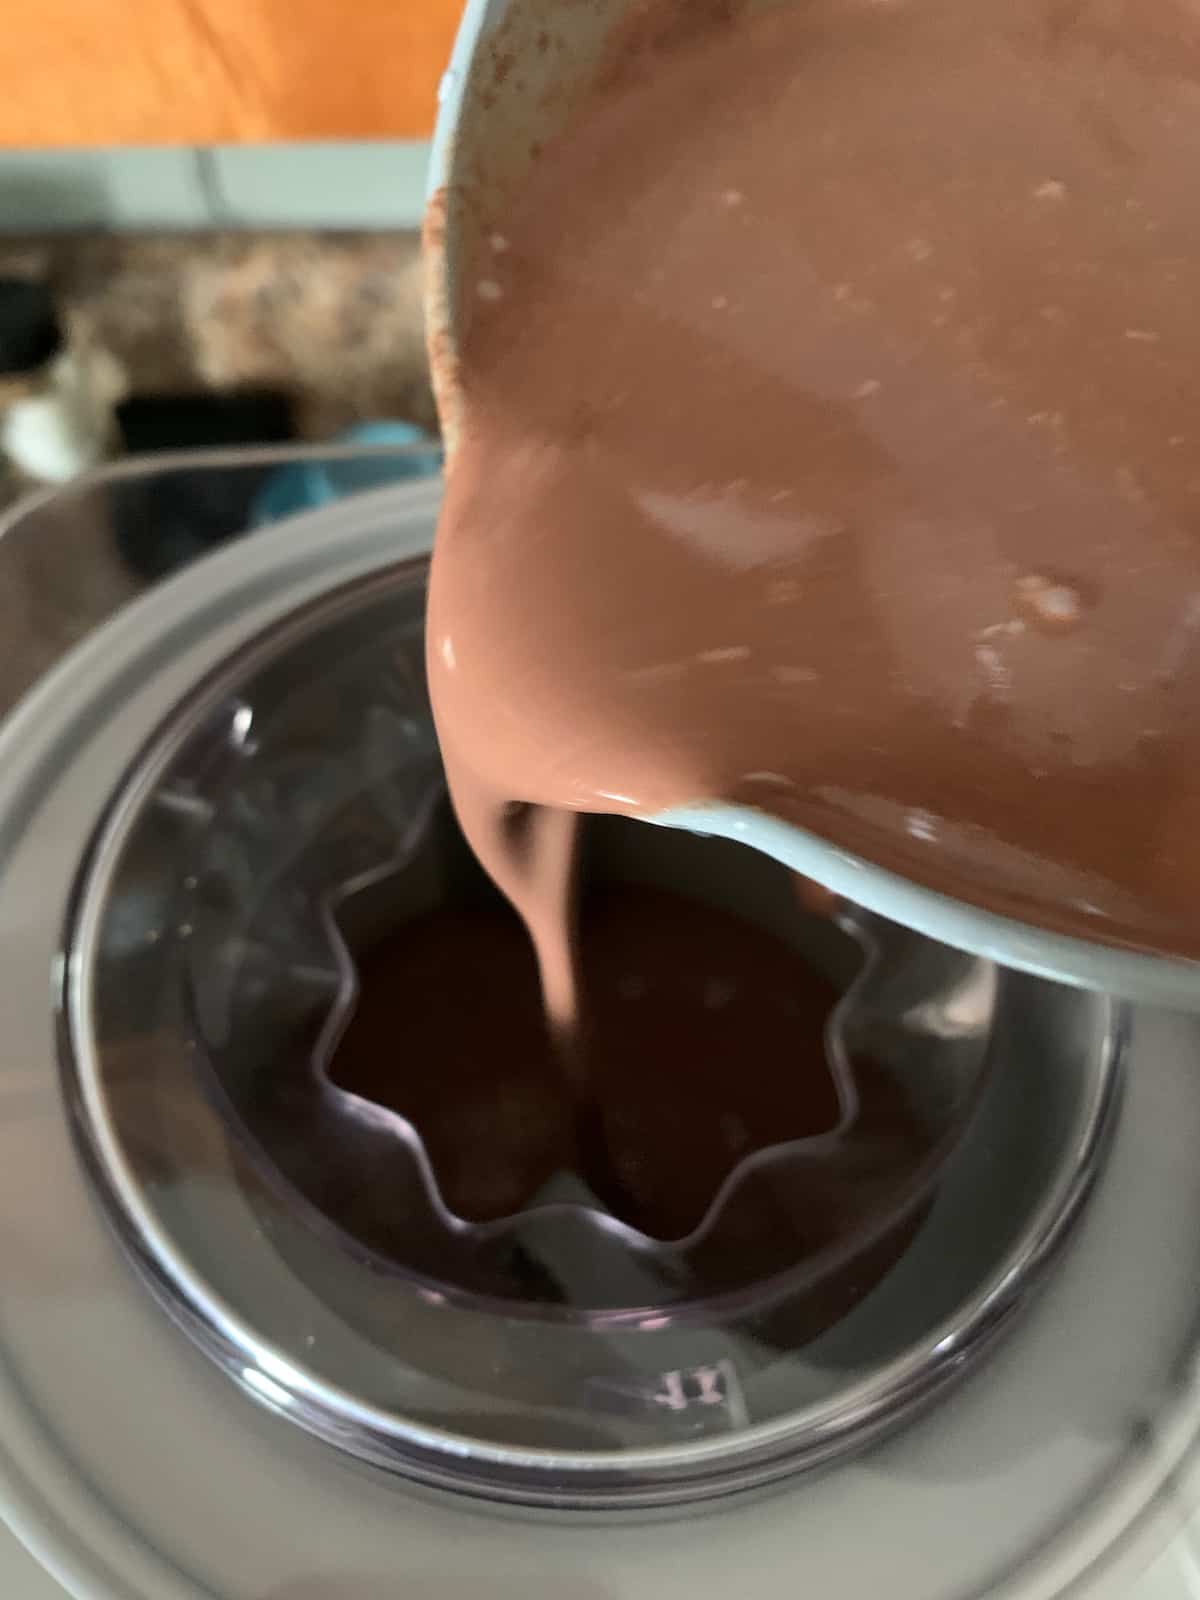
When you’re ready to churn, place the frozen bowl into your ice cream machine. Give the ice cream base one final whisk and pour it into the bowl. Freeze according to manufacturer’s instructions.
In the last minutes of churning, add the mini marshmallows and nuts. I add in batches so it does not clog the machine; keep a spatula nearby in case you need to help push the ice cream back down.
You can enjoy rocky road ice cream right out of the machine as soft-serve, or transfer it to an airtight container and freeze until more solid.
What kind of ice cream maker should I use?
My favorite ice cream maker is a Cuisinart 2-quart ice cream maker. This is just the right size for most recipes, especially those with mix-ins.
Smaller ice cream machines can overflow during churning if there is too much liquid added, so if you have a 1-quart machine keep an eye on it while it churns.
This recipe is not for the ice cream makers that require ice. However, those are great for those who need a larger capacity, as they make about 4 quarts of ice cream.
You can also use an ice cream bowl for the Kitchen Aid, if you have one.
Recipe Substitutions
Marshmallows – If you like, you can swap the mini marshmallows with marshmallow cream or fluff. This will give your rocky road ice cream a lovely swirl of marshmallow throughout!
Make sure to warm the marshmallow fluff slightly so that it is easier to spoon into the ice cream. You don’t want it hot; just a few seconds will do.
Nuts – This rocky road recipe uses peanuts, but you can swap in other nuts as well!
Try it with sliced or slivered almonds, walnuts, or cashews. Chopped pecans would also be delicious. Make sure any nut you use isn’t too large so they mix in easily.
You can also add chocolate chips if you like, but I prefer to leave them out.
Other ice cream recipes you’ll love
Once you’ve made homemade ice cream the first time, it’s hard to not be hooked on it! Try one of these recipes next time:
- Vanilla Bean Ice Cream
- Chocolate Frozen Yogurt
- Peanut Butter Brownie Ice Cream
- Strawberry Pretzel Ice Cream
- Cranberry Ice Cream
With its smooth chocolate ice cream, chewy marshmallows, and crunchy peanuts, rocky road ice cream is a classic you’ll love!

Rocky Road Ice Cream
Ingredients
- 2 cups heavy cream
- 3/4 cup granulated sugar
- 6 tablespoons cocoa powder
- 3 ounces bittersweet chocolate, broken into pieces
- 1 1/3 cups milk
- 1 teaspoon pure vanilla extract
- Pinch salt
- 1 1/2 cups mini marshmallows
- 1 cup roasted peanuts
Directions
- Make sure the canister of your ice cream machine * has been in the freezer for at least 8 hours before preparing this recipe.
- In a saucepan, combine cream, sugar, and cocoa powder. Bring to a boil over medium heat, whisking to melt sugar and combine ingredients.2 cups heavy cream, 3/4 cup granulated sugar, 6 tablespoons cocoa powder
- Once boiling, remove from heat and add chocolate, whisking to melt completely. Transfer to a larger container if needed, then whisk in milk, vanilla, and salt. Cover and chill for a minimum of 2 hours, but preferably longer.3 ounces bittersweet chocolate, 1 1/3 cups milk, 1 teaspoon pure vanilla extract, Pinch salt
- When ready to churn, place the frozen canister in the machine. Remove the ice cream mixture from the freezer and pour it into the canister. Churn according to manufacturer's instructions.
- In the last few minutes of churning, add the mini marshmallows and peanuts. Once mixed in and ice cream is churned, scoop into an airtight container and chill until solid.1 1/2 cups mini marshmallows, 1 cup roasted peanuts
Notes
Want to save this recipe for later?
Recommended Products
Nutrition
Nutrition information is provided as a courtesy and is an estimate based on online calculators. Any nutritional information found on Stetted should be used as a general guideline only.
You might also like:


About Megan
I learned how to cook by exploring seasonal ingredients, and you can too! Meal time shouldn’t be stressful or complicated, and with fresh ingredients and easy methods, I’m here to help you enjoy the time spent in the kitchen. Read more…


Loved your tip to run it through the blender before freezing, turned out so very creamy and smooth!
Rocky road is one of our favorite ice creams! Thanks for this great recipe!
Seriously drooling over this ice cream!! There is nothing better than homemade!
We made this homemade ice cream for Father’s Day and it was the hit of the meal. Perfectly creamy and delicious.
This is one of our favorite flavors, will be trying it out this weekend!
Way too much coco so if you cut it back 50% it’s good.
I had about 50 people at a picnic tell me this!!!!
Hi Greg, I’m sorry this recipe wasn’t to your tastes. My recipe actually uses less cocoa powder than other comparable recipes already. It’s possible the bittersweet chocolate was where folks didn’t like the flavor. For anyone else making this, swapping in semisweet chocolate for the bittersweet is always an option.