*This post contains affiliate links and may earn commissions on recommended products. As an Amazon Associate, I earn from qualifying purchases.

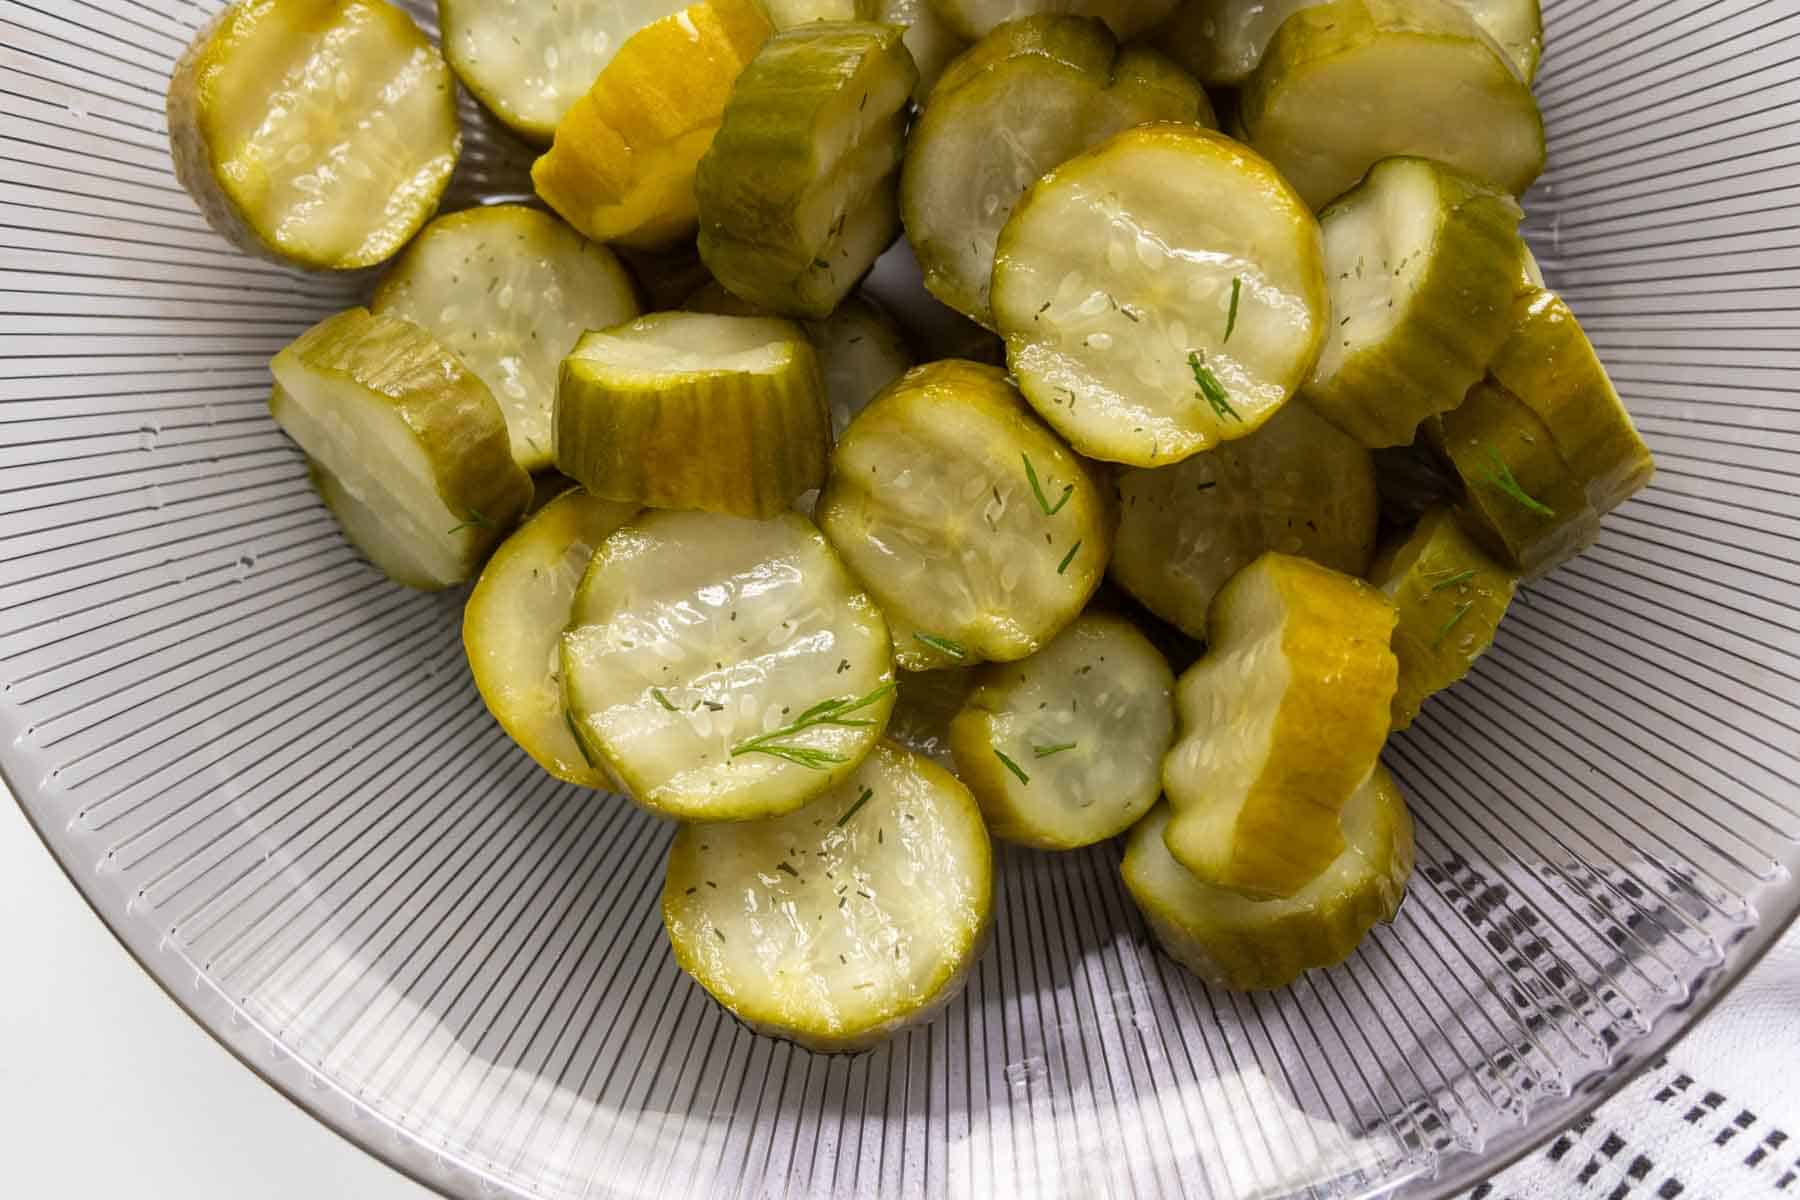
Essential for summer snacking and burger topping, these crisp refrigerator dill pickles couldn’t be easier! No heating required!
One strong memory I have from childhood is of my neighbor, who always smelled like pickles. This wasn’t a bad thing; it was because he worked making burgers every day, frequently dipping into that jar of pickles for topping them.
All these years later and I’m now never without a jar of pickles in my fridge! Aside from our standard pickled red onions all year, I load up in the summer with bread and butter pickles and plenty of crunchy dill pickles.
While I often can other varieties of pickles for the pantry, truth be told I usually don’t do it with cucumber pickles because we go through them so quickly!
This recipe makes about 1 quart of pickles and uses 1 pound of cucumbers, so it’s perfect to make when you crave that tangy crunch without grabbing canning equipment and diving into piles of cukes!
Ingredients for dill pickles
This is just an overview. For full measurements and step-by-step instructions, scroll down to the printable recipe card, or use the button on the side.
You’ll need:
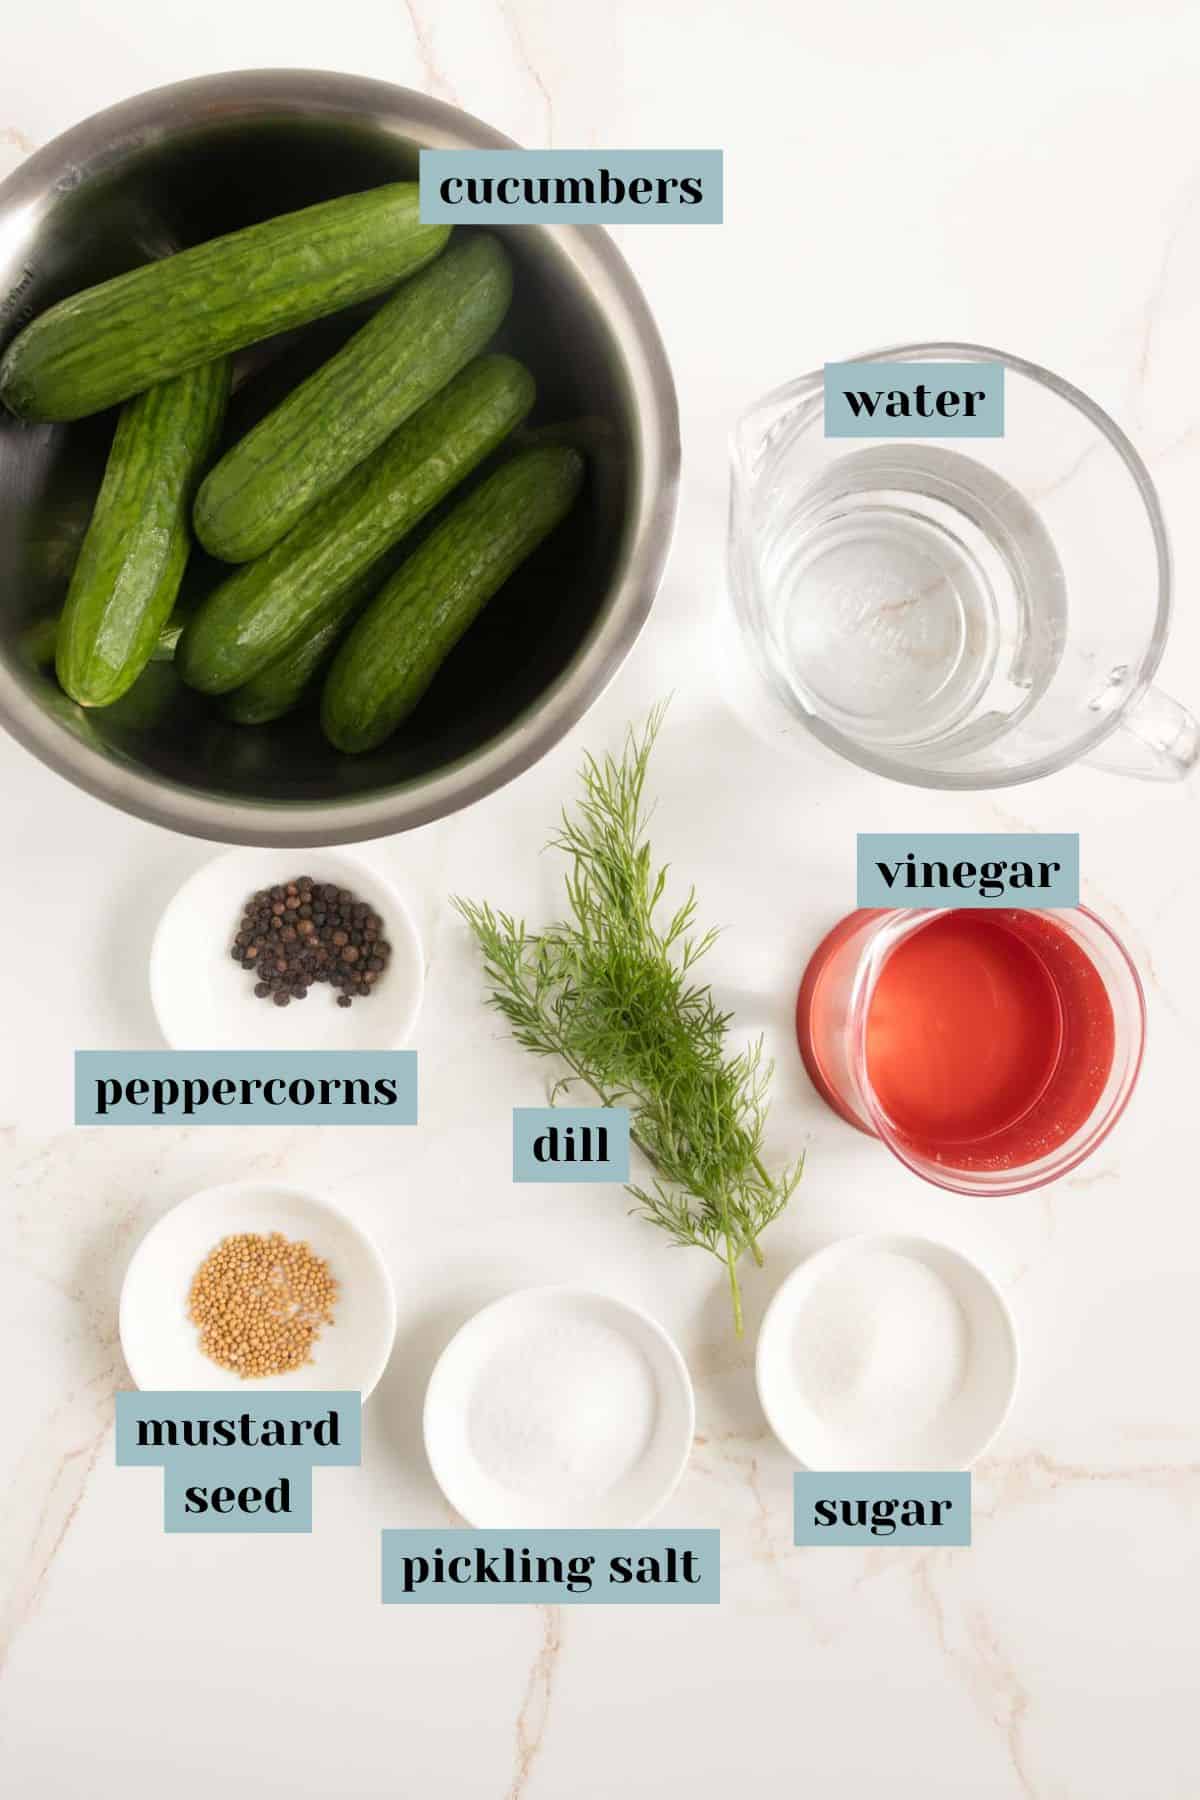
- Seedless cucumbers
- Distilled white vinegar
- Water
- Pickling salt, or fine sea salt
- Granulated sugar
- Fresh dill
- Black peppercorns
- Mustard seed
- Garlic cloves
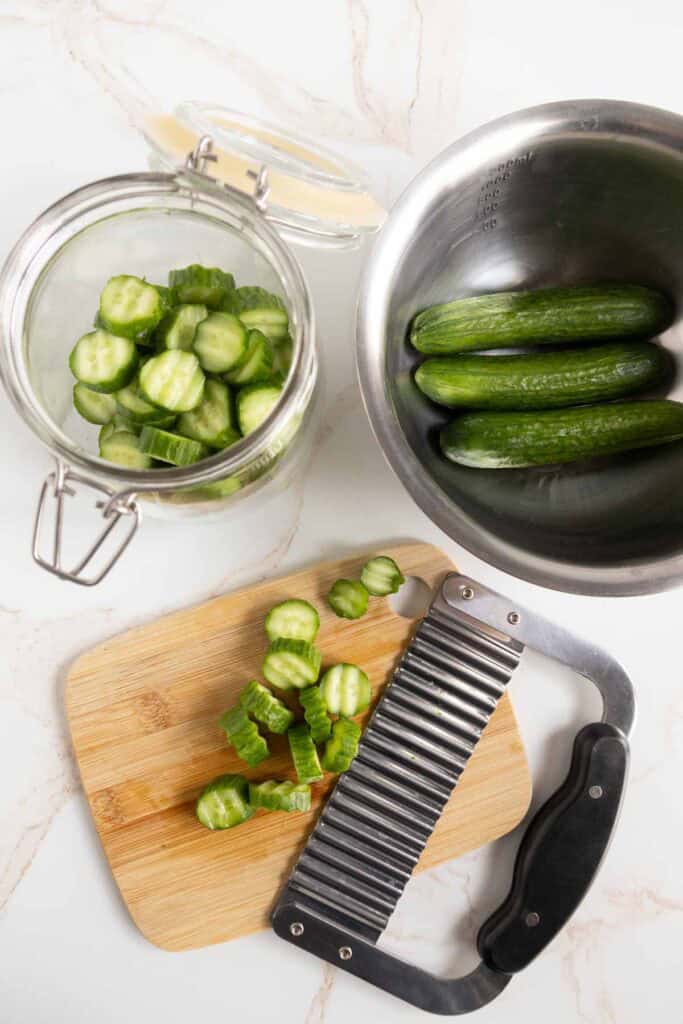
I like to use Persian cucumbers for these pickles. They’re considered seedless and retain their crunch well. English cucumbers are good too; just use any kind that doesn’t require peeling or have too many seeds.
You can swap the vinegar for a flavored vinegar, but note it will change the flavor of your pickles slightly. White wine vinegar or cider vinegar are good options.
If you have extra dill on hand, you can make my favorite creamy dill potatoes.
Equipment
For fridge pickles I like to use a swing-top mason jar *, or simply a plastic deli container. If you’re using a regular mason jar, I recommend one with a wide mouth so it’s easier to get the pickles out.
I used a crinkle cutter * to give my pickles that signature look, but a regular paring knife * will do!
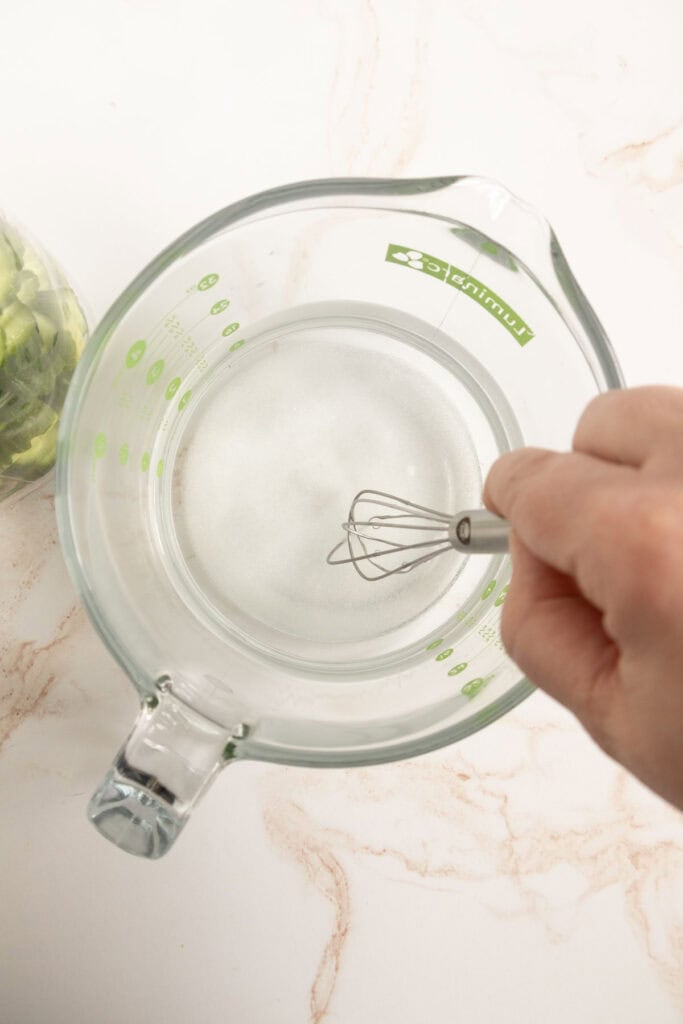
Other useful tools are a liquid measuring cup * and a small whisk *.
quick pickle tools
 Buy Now →
  Buy Now →
  Buy Now →
 *
Want to save this recipe for later?
How to make this recipe
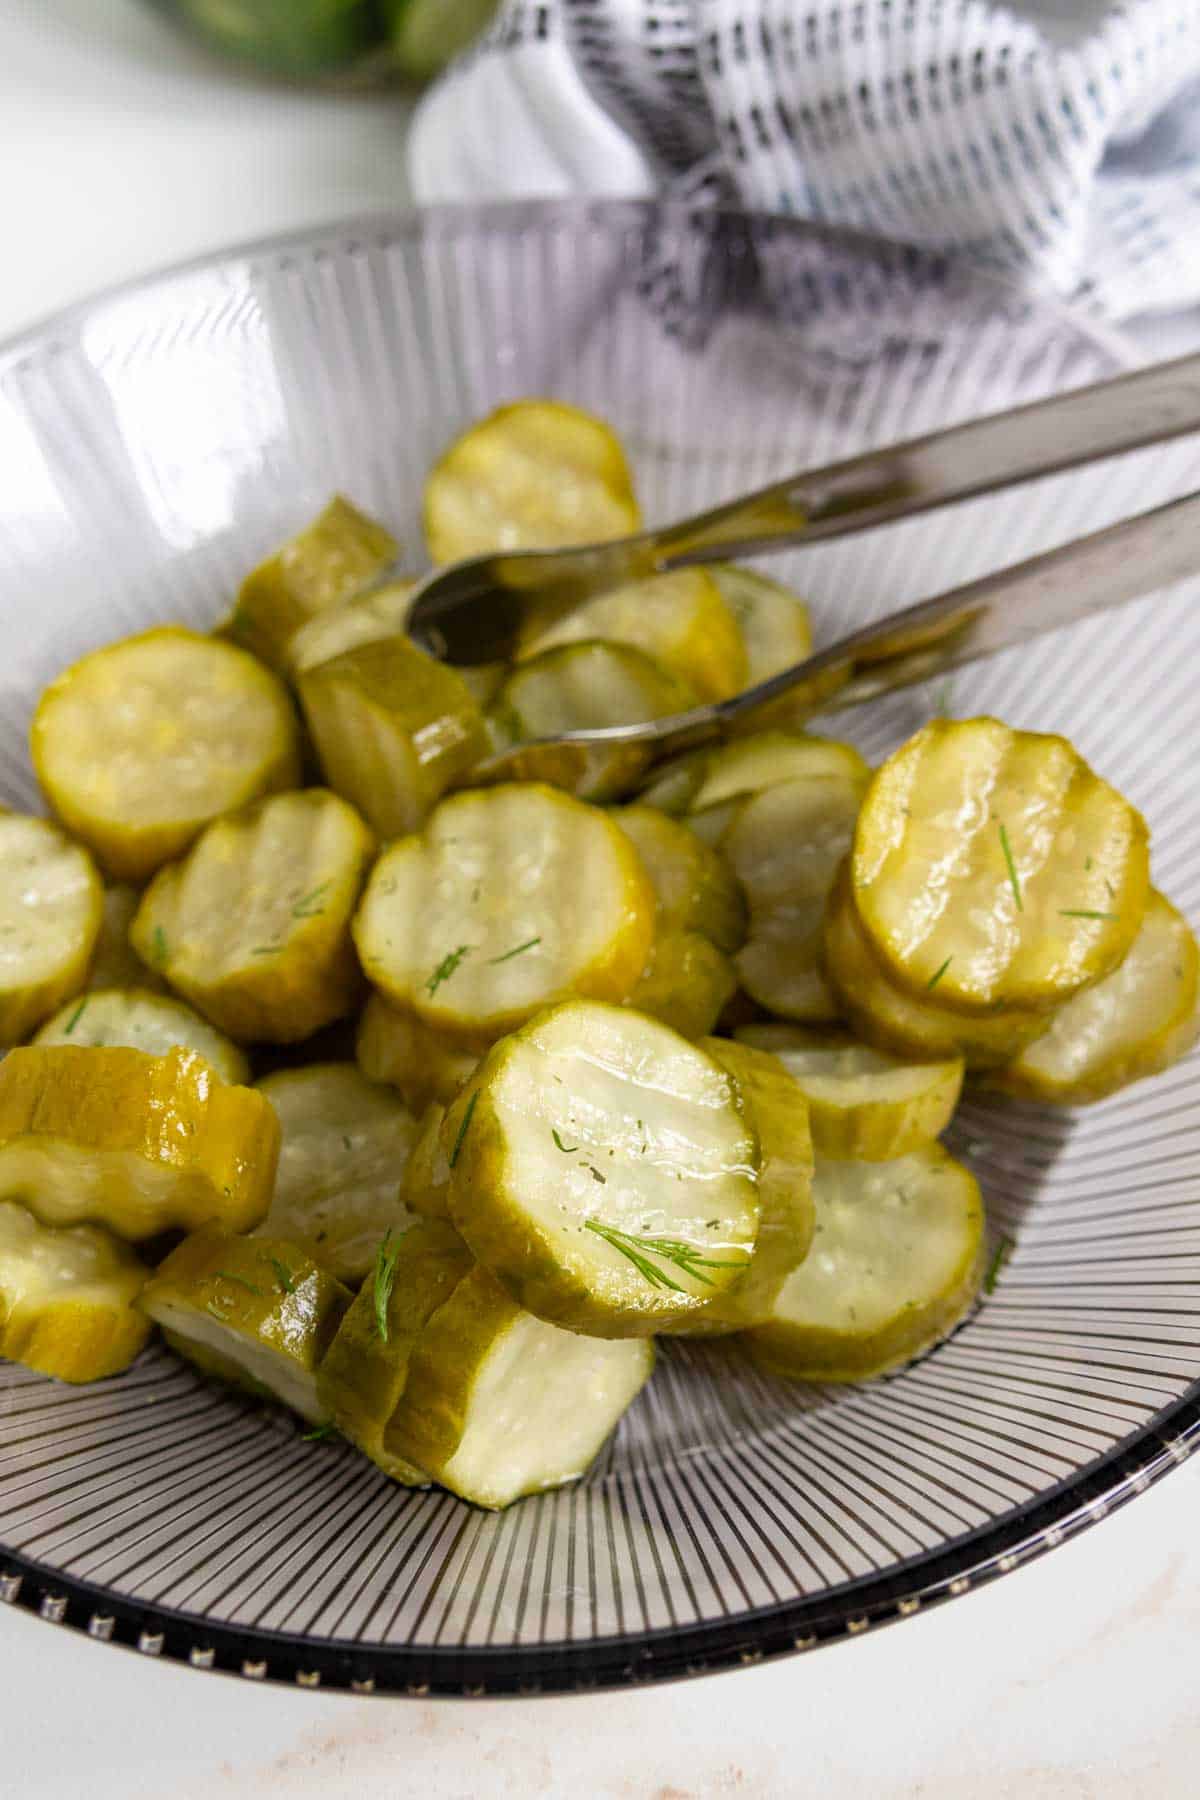
Wash and slice your cucumbers, discarding the ends. I like thicker pickles, so these were cut to about 1/4 inch. I don’t recommend cutting thinner than 1/8 inch here, or your pickles can end up not being crisp.
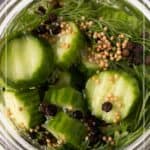
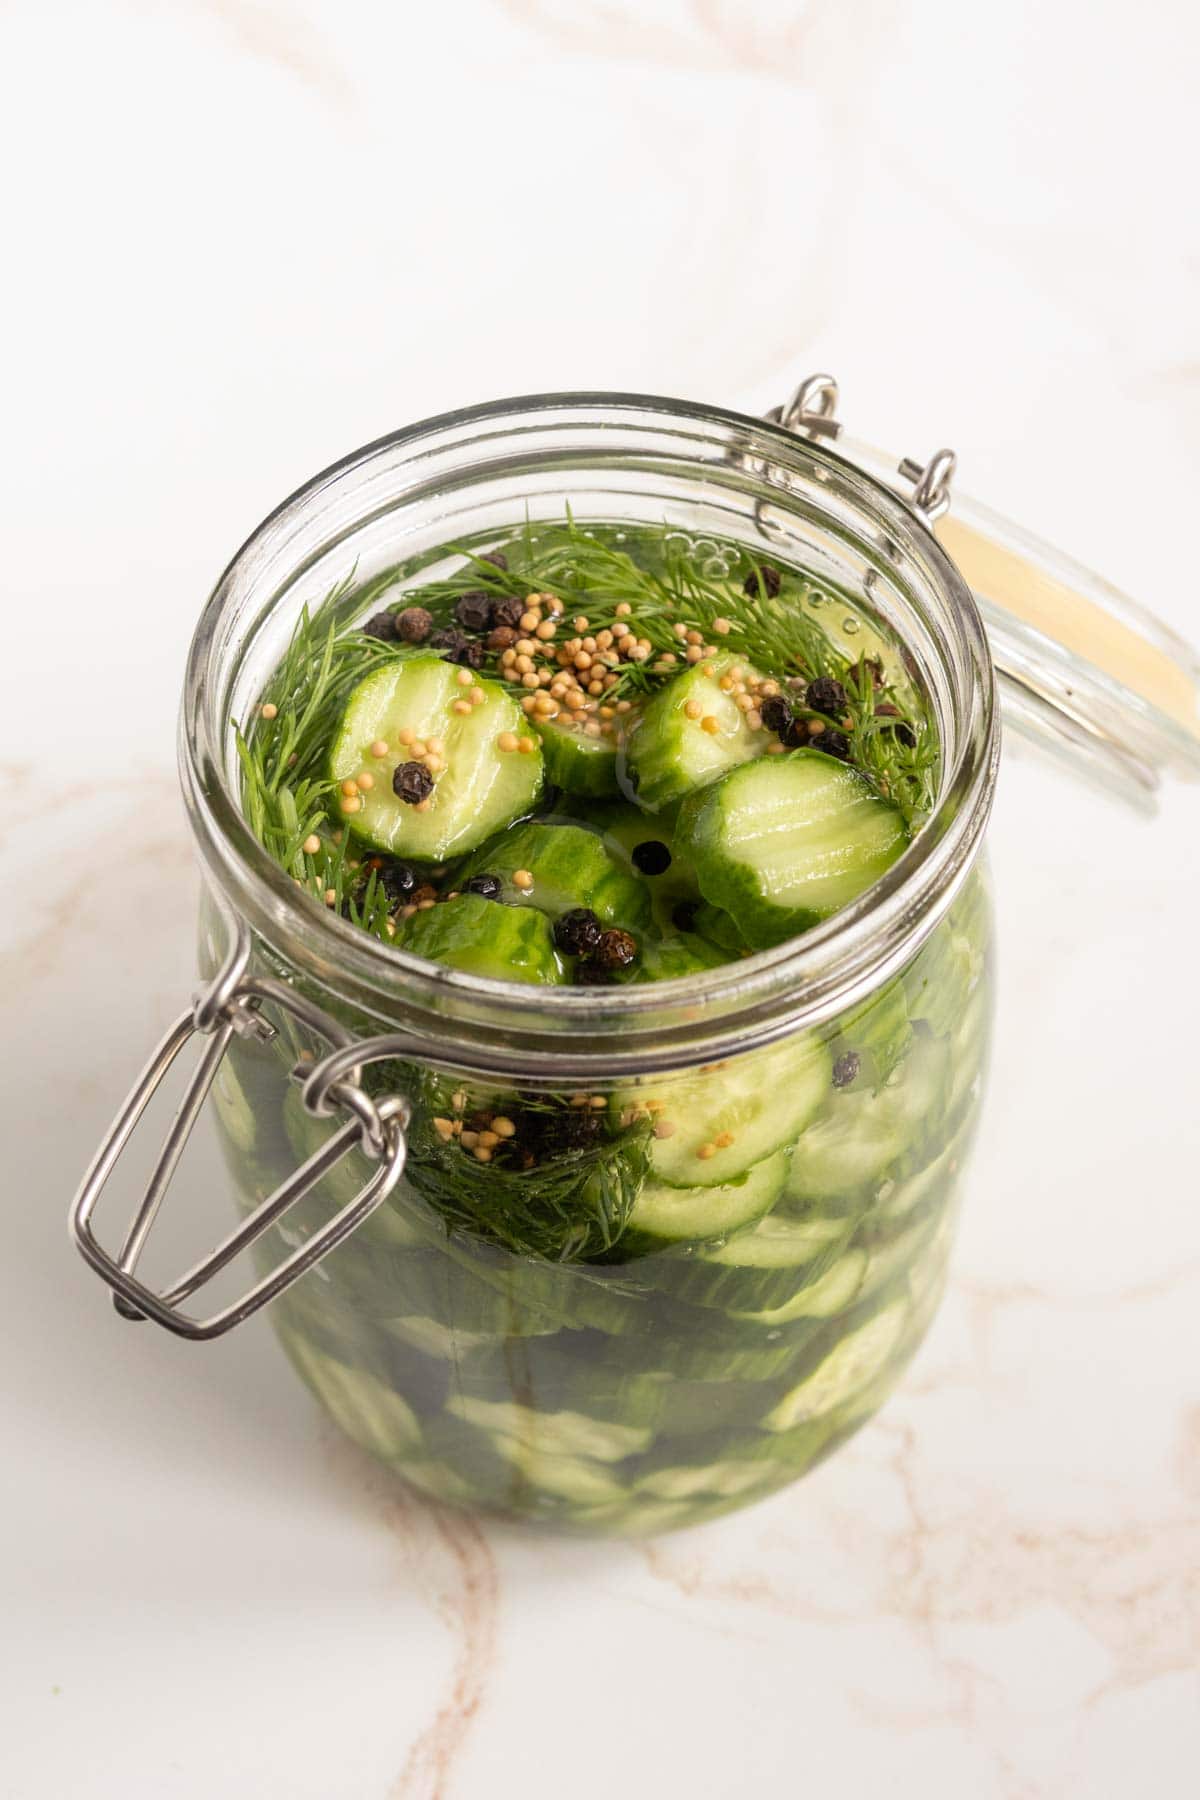
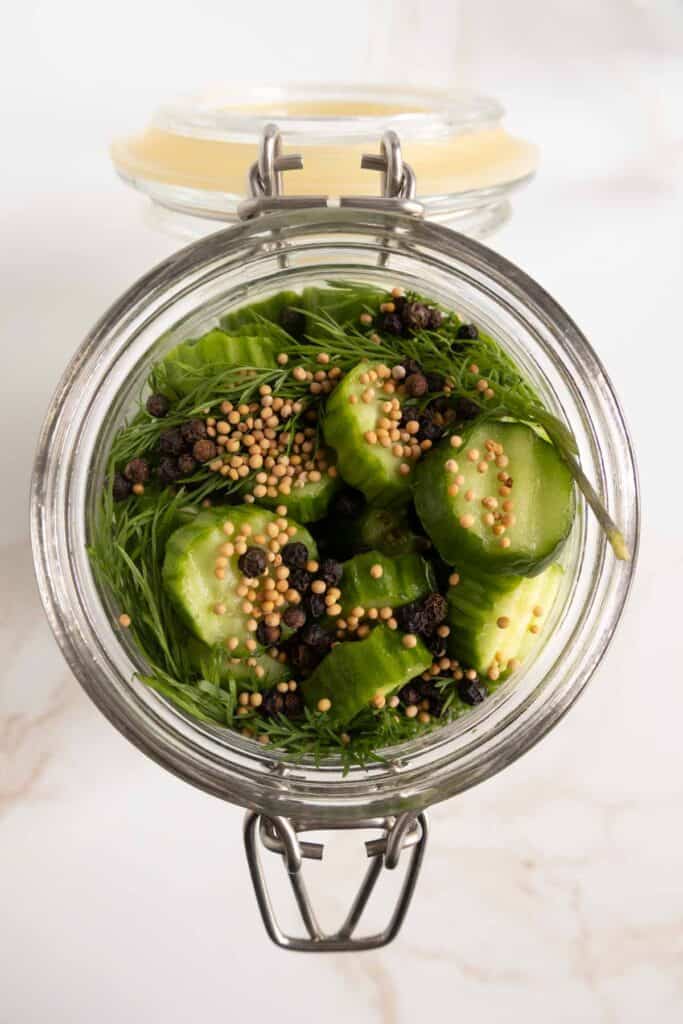
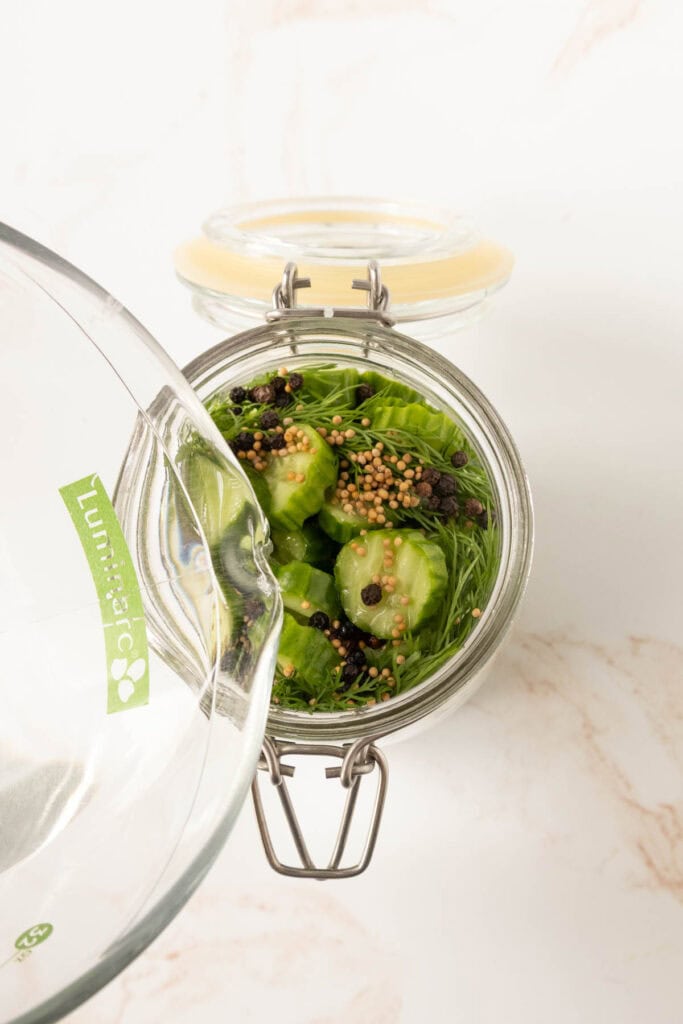
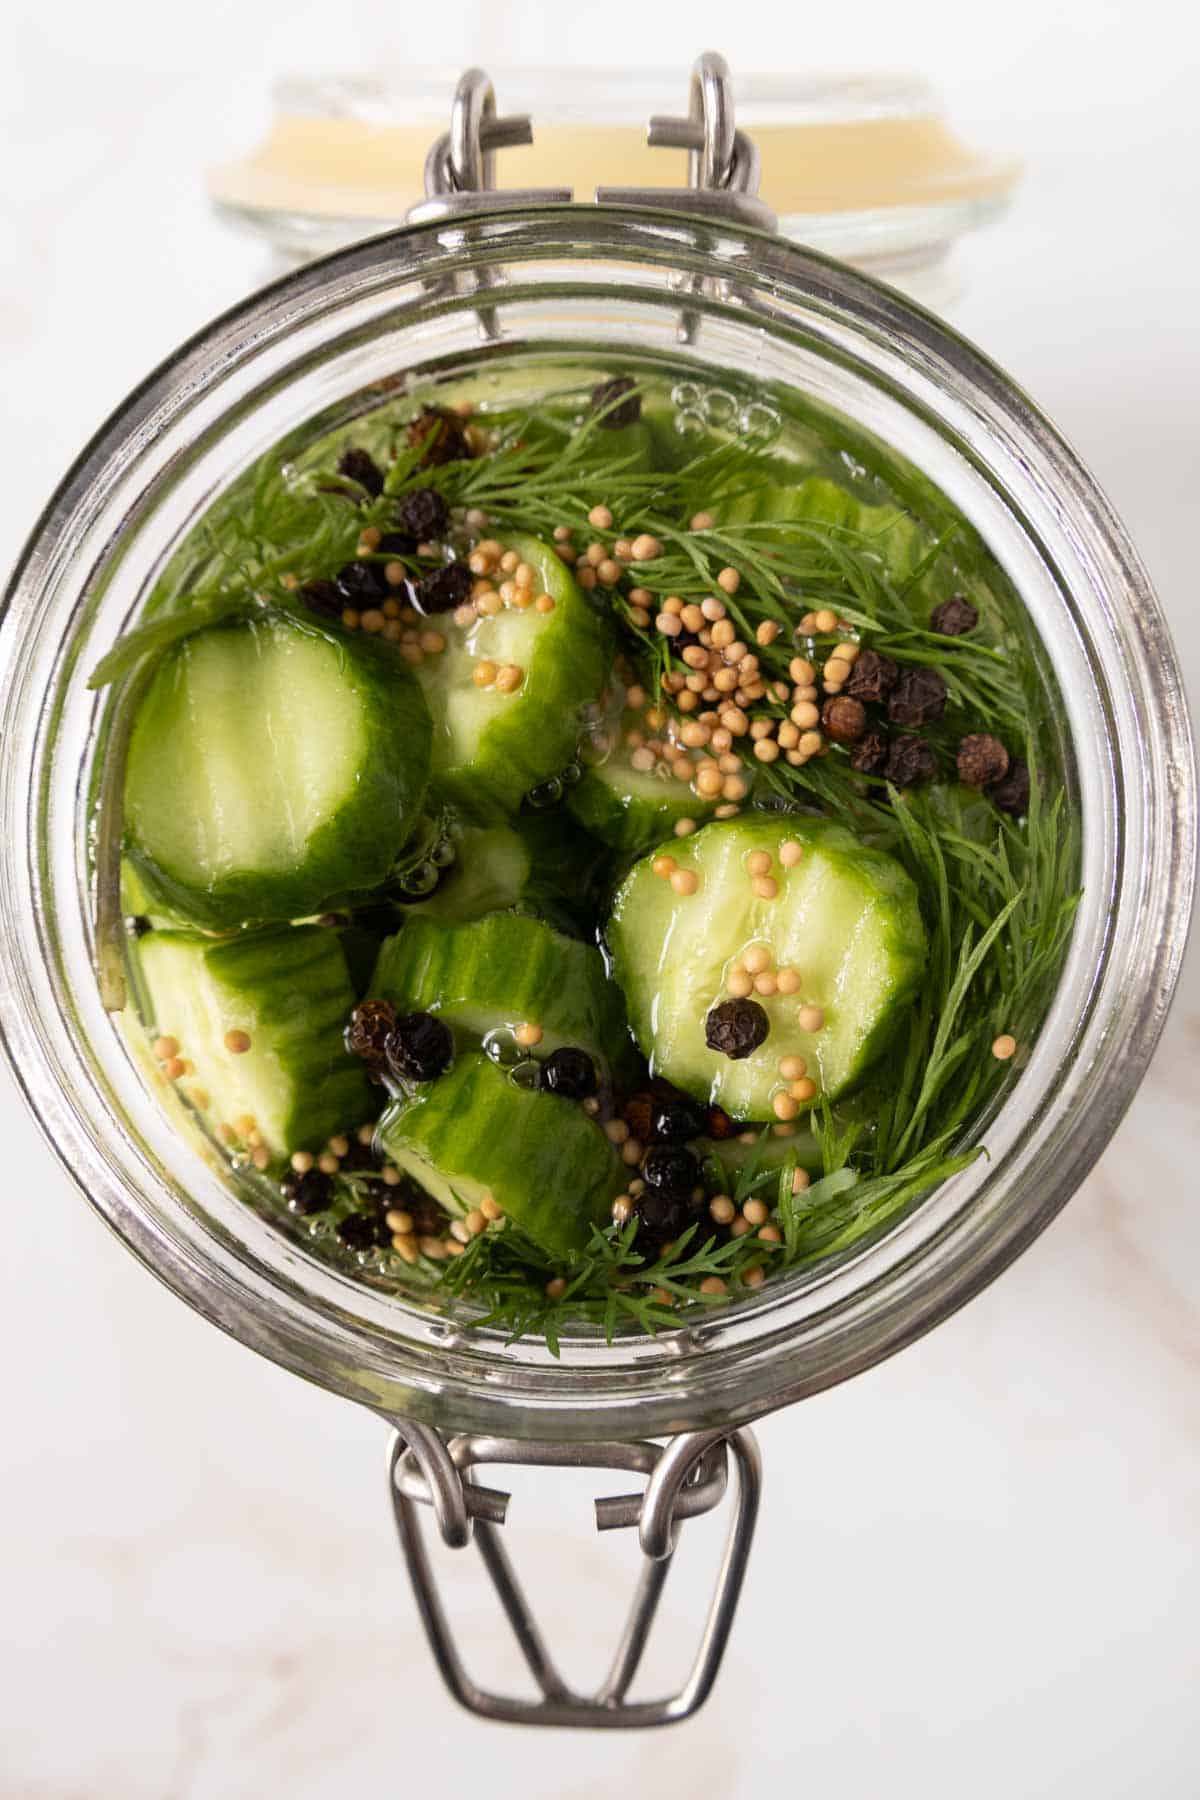
Pile the cucumbers into a quart jar (or two pint jars *) along with smashed garlic cloves, peppercorns, and mustard seed. Tuck the sprigs of dill in along the sides.
In a bowl or a liquid measuring cup, combine the vinegar, water, pickling salt, and sugar. Whisk, whisk, whisk until the salt and sugar are dissolved. As long as you use a fine salt, it shouldn’t take long.
Pour the brine over the cucumbers in the jar. Don’t pour too quickly, give the brine time to settle in among the slices. The brine should go all the way to the top of the cucumbers, but make sure to leave a little bit of space at the top of the jar to prevent spilling.
Cover tightly and pop the jar into the fridge. You’ll want to wait at least 24 hours before eating, but longer is better for more pickle flavor. They’ll keep for a month or more, if they last that long!
Recipe tips
Don’t reduce the amount of vinegar in this recipe. You can add more vinegar in place of some of the water if you like. Reducing the vinegar will make your pickles bland and watery, not tart, tangy, and crisp!
You can add other ingredients to the pickles, like red pepper flakes for spice or extra garlic.
If you don’t have fresh dill available, you can use dried dill. Keep in mind it’s more potent, so you only need about 1 teaspoon per 1 tablespoon of fresh.
Your pickles can use some of their bright color in storage. This can happen if the jars were packed a bit too tightly for the brine to evenly soak them, or if you’ve used any vinegar other than white distilled. (Cider vinegar will add a yellowish tinge.)
If you have fresh grape leaves available, tuck one or two into the jar. It will help keep your pickles a bit crisper!
These are great chopped and added to dill pickle pasta salad, or simply snack away.
more easy pickle recipes
There’s nothing like the refreshing crunch of a refrigerator dill pickle on a hot summer day. Make a batch today!
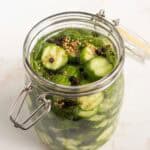
Refrigerator Dill Pickles
Ingredients
- 1 pound seedless cucumbers
- 2 cloves garlic, crushed
- 1 teaspoon black peppercorns
- ½ teaspoon mustard seed
- 2-3 sprigs fresh dill, (about 1 tablespoon packed dill leaves)
- 1 cup distilled white vinegar
- 1 cup water
- 1 tablespoon pickling salt, or fine sea salt
- 2 teaspoons granulated sugar
Directions
- Slice cucumbers and discard ends. Place the cucumbers into a quart jar (or two pint jars) along with the crushed garlic, peppercorns, and mustard seeds. Tuck the fresh dill into the sides of the jar.1 pound seedless cucumbers, 2 cloves garlic, 1 teaspoon black peppercorns, ½ teaspoon mustard seed, 2-3 sprigs fresh dill
- In a bowl or liquid measuring cup, combine the vinegar, water, salt, and sugar. Whisk until the salt and sugar are completely dissolved.1 cup distilled white vinegar, 1 cup water, 1 tablespoon pickling salt, 2 teaspoons granulated sugar
- Pour the brine over the cucumbers slowly, letting it fill in the cracks between the cucumbers. You should be able to use all of the brine.
- Cover tightly and place in the refrigerator. Let rest for at least 24 hours before eating, but preferably longer for better pickle flavor.
Notes
- Makes 1 quart
Want to save this recipe for later?
Nutrition
Nutrition information is provided as a courtesy and is an estimate based on online calculators. Any nutritional information found on Stetted should be used as a general guideline only.
You might also like:


About Megan
I learned how to cook by exploring seasonal ingredients, and you can too! Meal time shouldn’t be stressful or complicated, and with fresh ingredients and easy methods, I’m here to help you enjoy the time spent in the kitchen. Read more…