*This post contains affiliate links and may earn commissions on recommended products. As an Amazon Associate, I earn from qualifying purchases.

Love the tangy taste of pickles? Learn how to make pickles and transform just about any vegetable into a delicious crunchy snack! This guide breaks down everything you need to know about making pickles at home.
While many people associate pickles with summertime, pickles are a great option for preparing vegetables (and fruits) all year long.
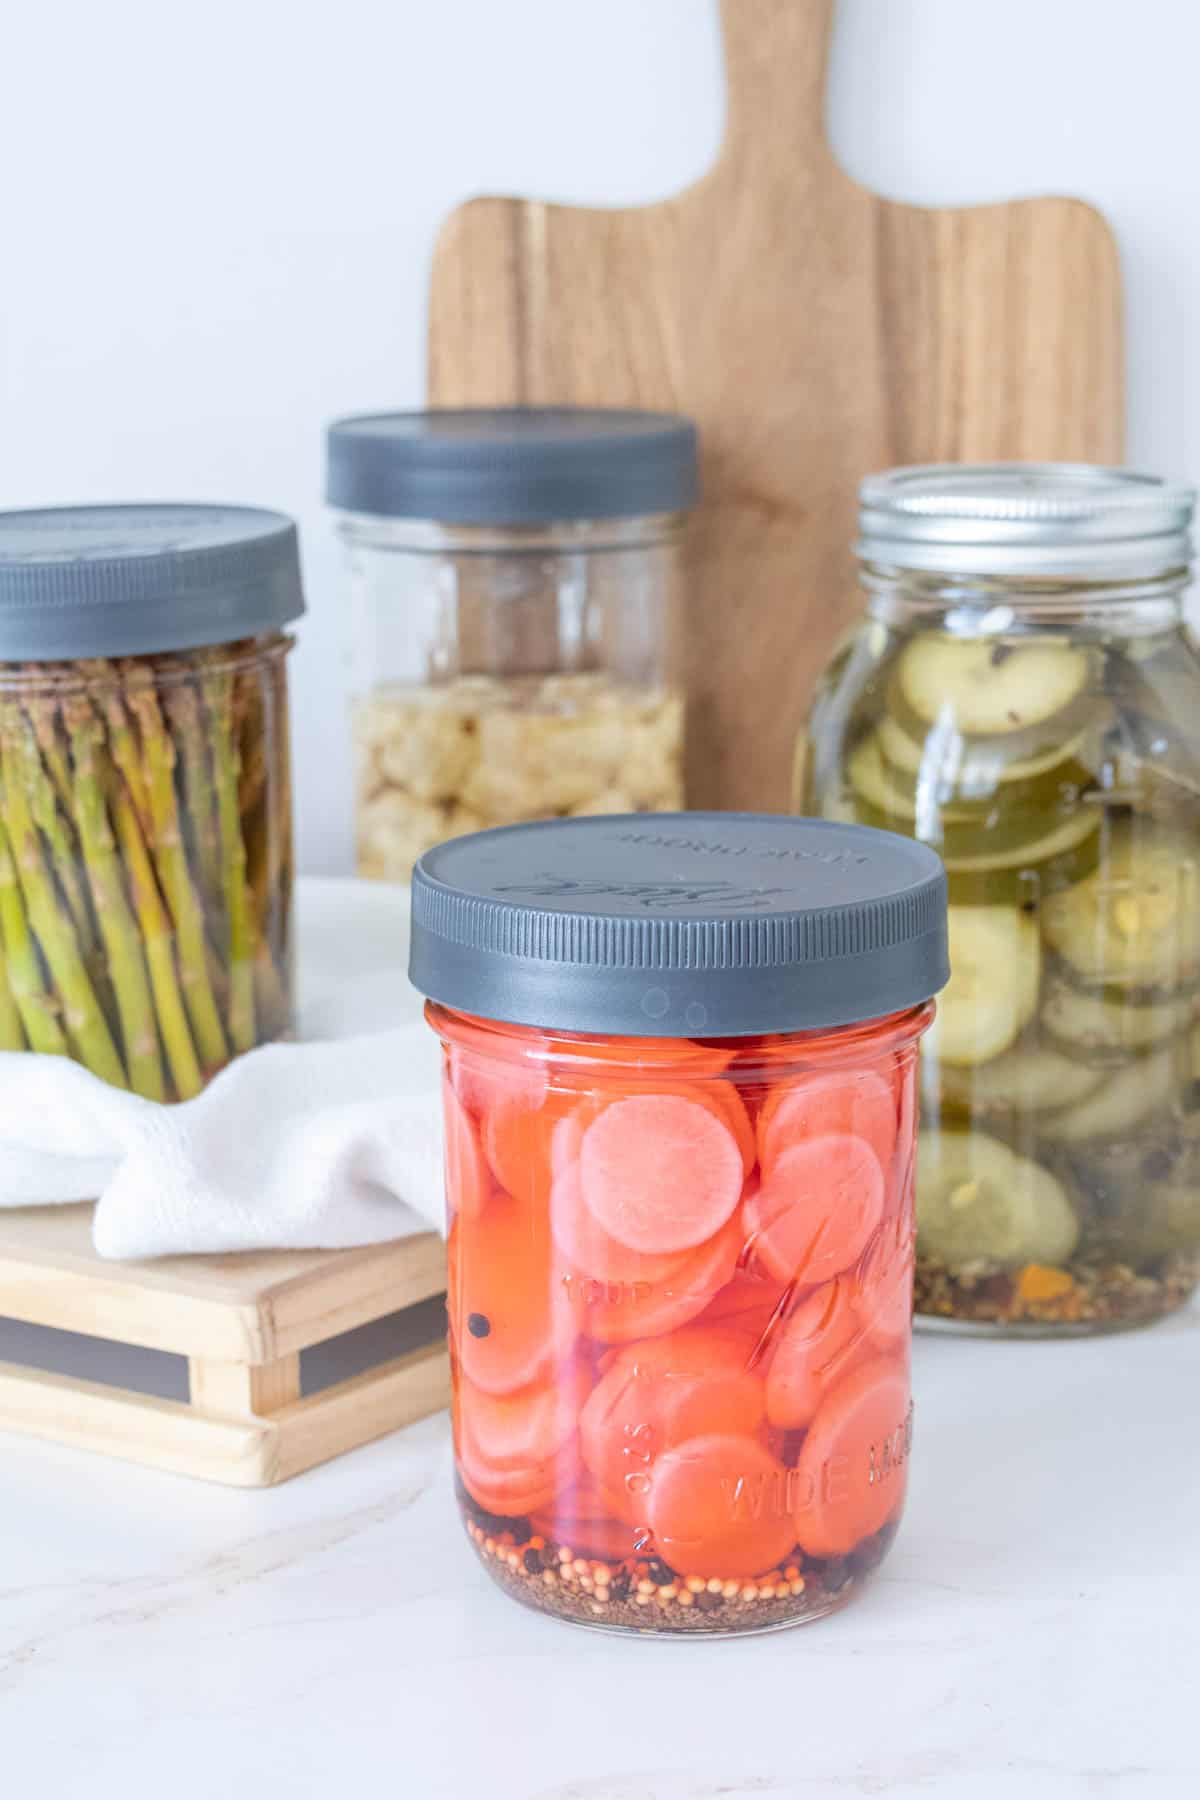
You’re probably familiar with dill pickles and bread and butter pickles, but there’s so many more versions to try. From cauliflower to cucumber and green beans to blueberries, there’s a pickle out there for everyone.
Even though it might seem intimidating, pickles are quick and easy to make. In fact, the hardest part might be waiting to eat them!
Whether this is your first time making pickles or your tenth, there’s always something more to learn!
Basic pickle ingredients
Vinegar – Vinegar is a key component in pickles, giving them that classic tangy taste.
While there are many kinds of vinegar available, the vinegar you use for pickling should be at least 5% acidity. The acidity percentage should be on the label, but most vinegars sold for cooking are at or above this level of acidity.
Distilled white vinegar is the most common vinegar used for pickling. You can also use (apple) cider vinegar, white wine vinegar, or rice vinegar. Red wine vinegar can also be used, but will tint your pickles.
Water – Water is usually added at 50% or less of the brine. Quick pickles benefit from less water and more vinegar.
Do not exceed 50% water in the brine, especially for water-bath canning. A higher percentage of water will have a weaker flavor and can cause bacterial growth in a water-bath canned pickle.
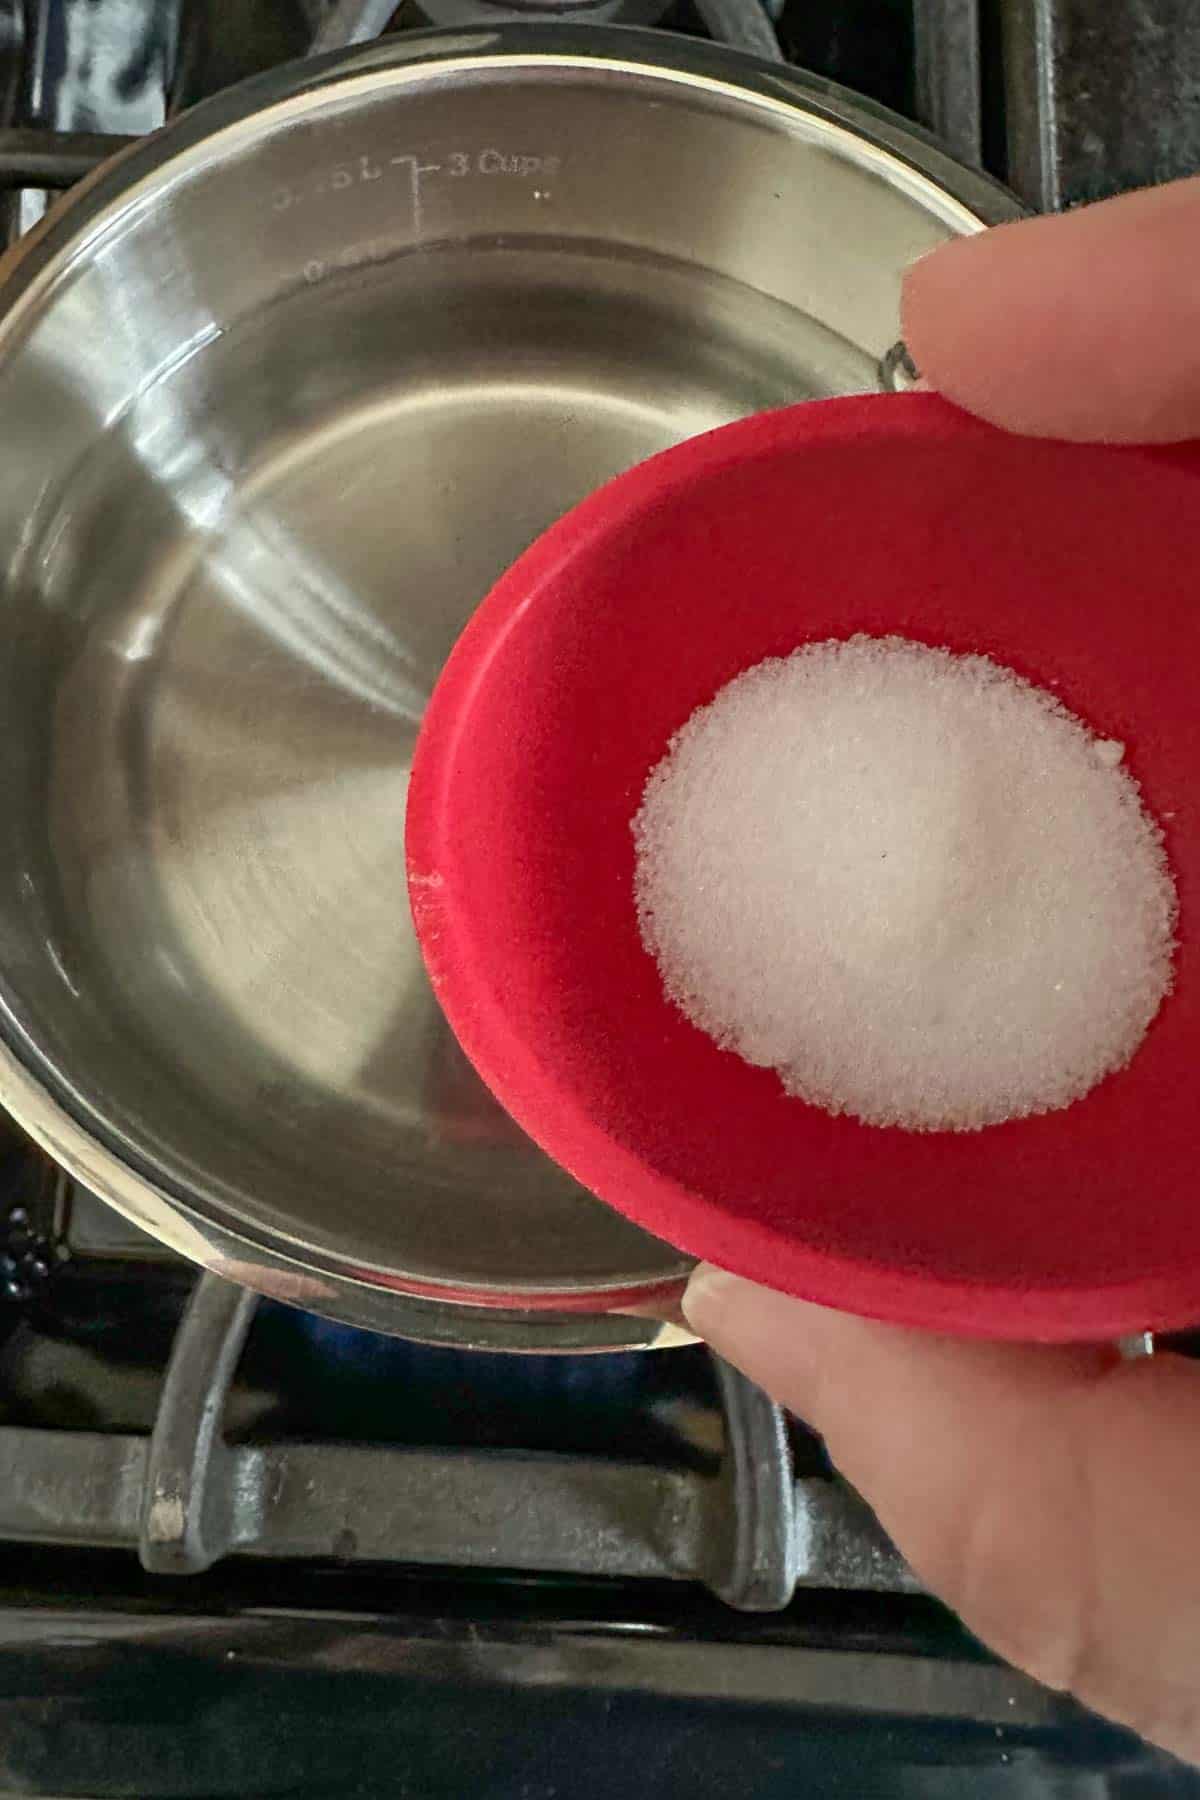
Pickling salt – Pickling salt is a very finely ground salt. It dissolves quickly in liquids, which is why it is perfect for making pickles!
Pickling salt is often sold in large boxes. Salt does not expire, so one box can last for many batches of pickles.
However, if you do not want to purchase pickling salt, you can use fine sea salt instead.
Sugar – While not all pickling recipes call for sugar, many do. You’ll want standard granulated sugar for pickles.
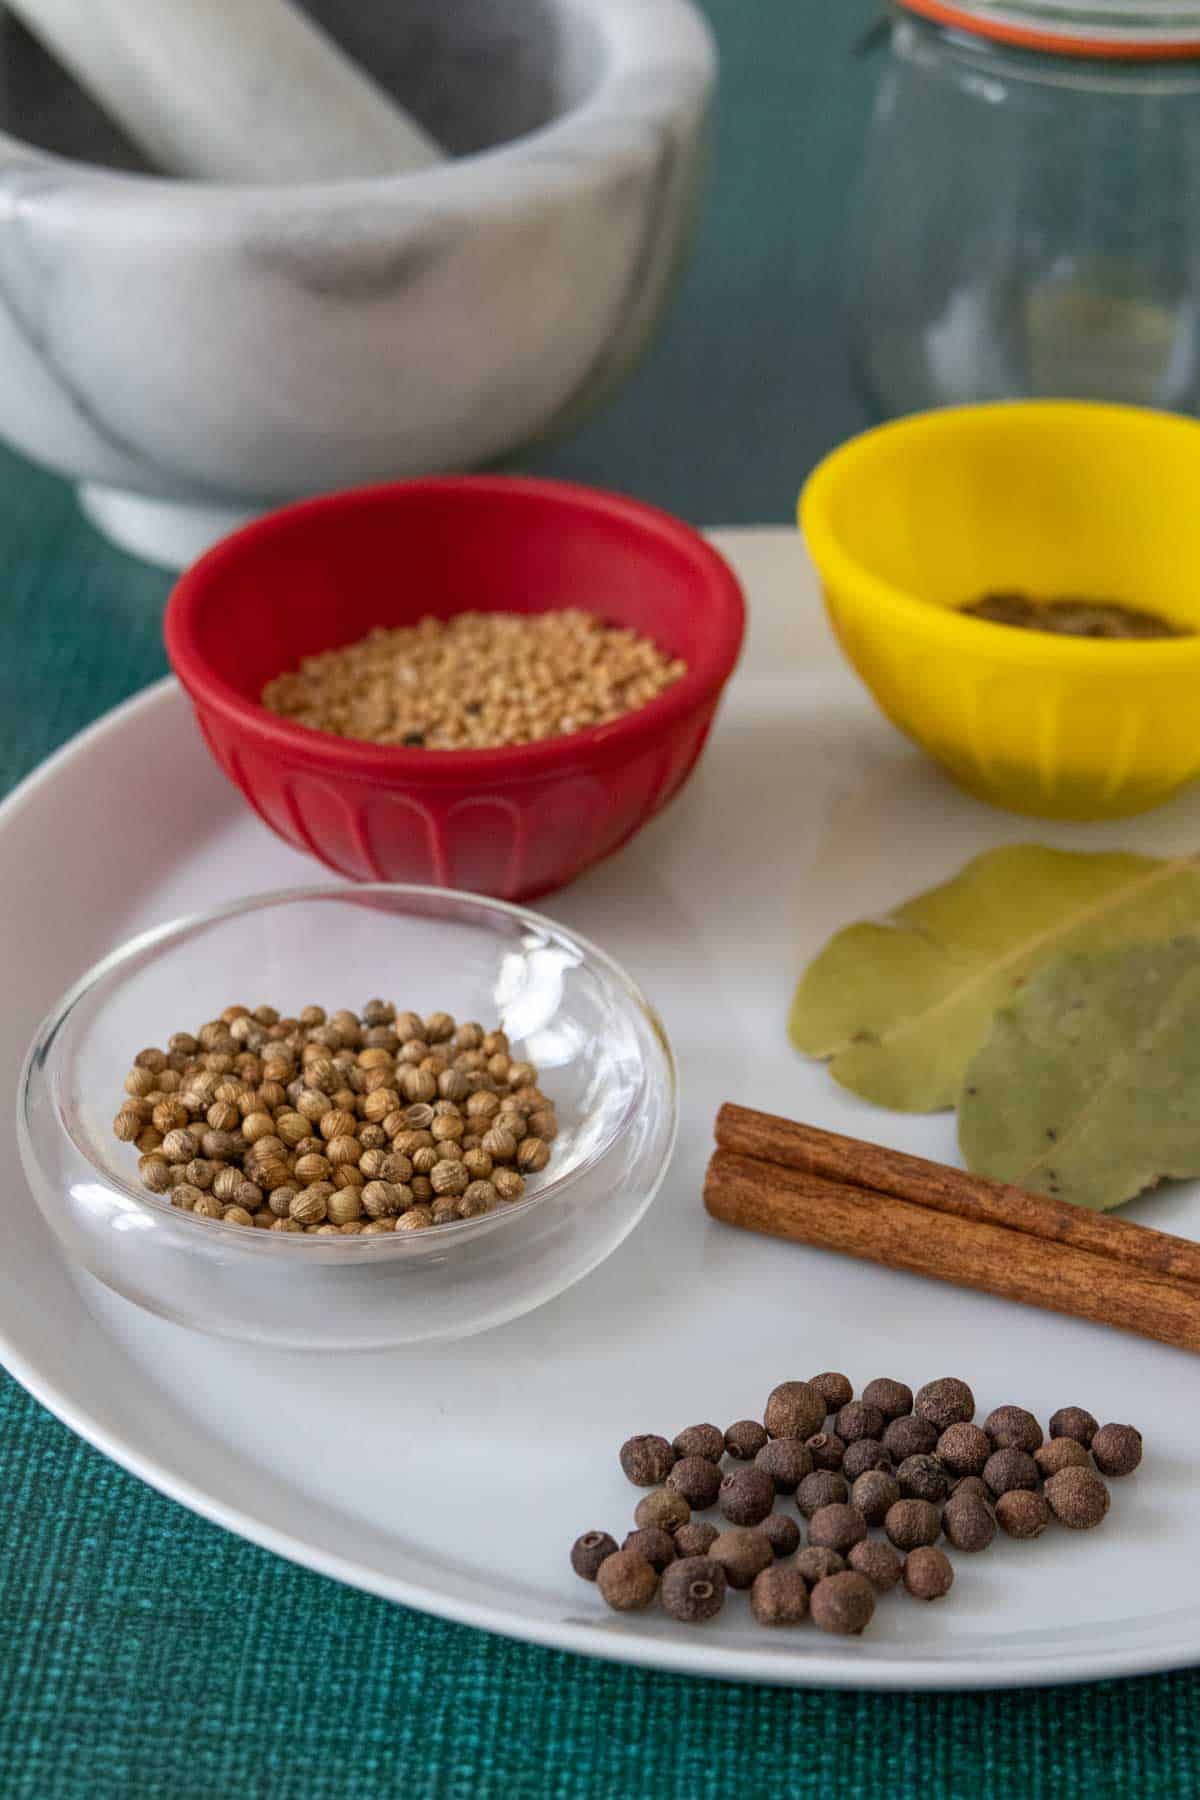
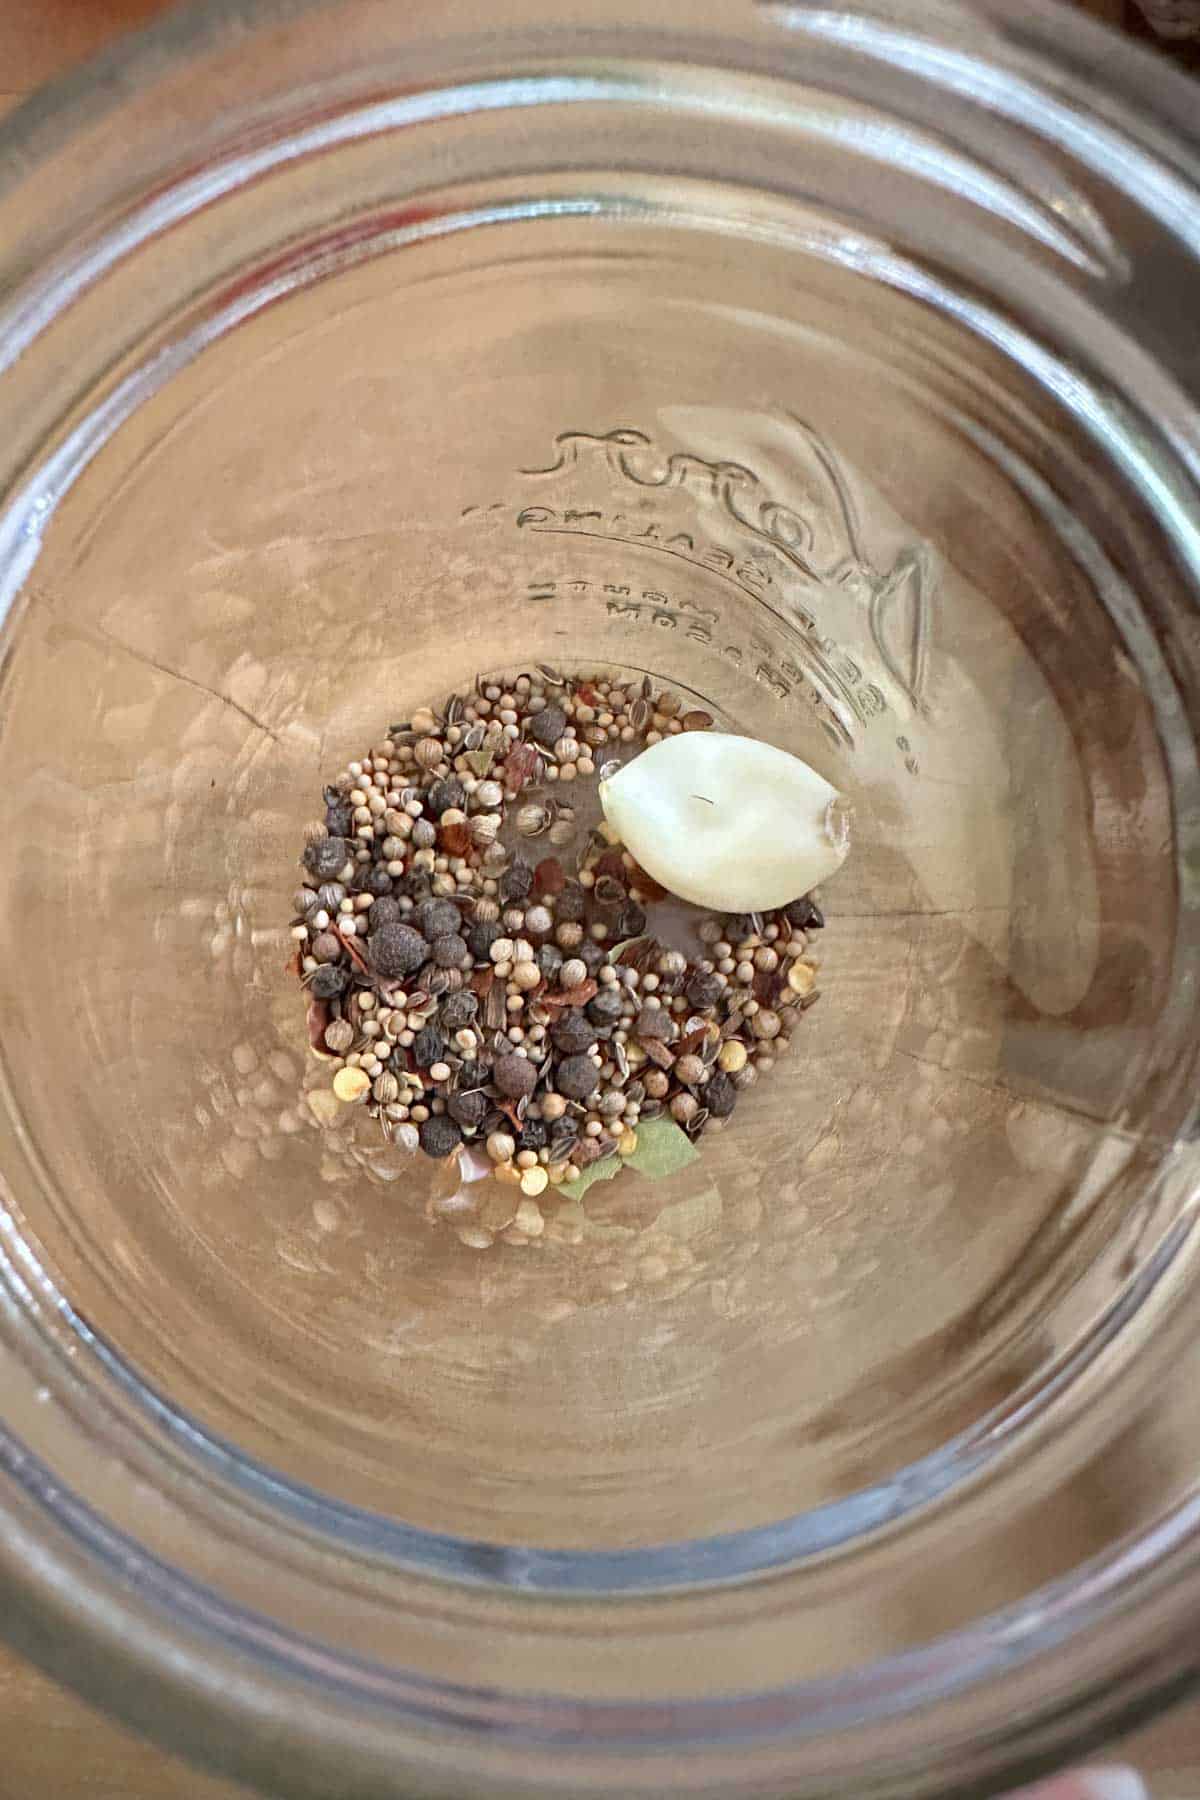
Spices – Pickling spices vary based on the kind of pickle you want to make. You can purchase a blend from the grocery store, or make your own pickling spice.
Common pickling spices include mustard seed, celery seed, black peppercorns, bay leaf, cinnamon sticks, coriander seed, and dill seed.
Vegetables or fruits – You’ll need anywhere from 8 ounces to multiple pounds of fruits or vegetables to pickle, depending on how much pickle you want to end up with.
Because produce varies a lot in size, it’s a good idea to buy with weight in mind, not a cup measurement. For small batches of pickles, you’ll usually need about 1 pound, which will yield 1 pint of pickles.
Choose produce that is firm and free of any soft spots or blemishes. Skins should be smooth rather than wrinkled, and fruits should be plump.
Equipment you’ll need
Glass mason jars – Mason jars * are perfect for storing pickles, whether you are making refrigerator pickles or canned pickles.
The size and number of jars will depend on how many pickles you want to make. You also need to factor in the size of your pickle. Longer pickles, like pickled asparagus or dill pickle spears, need to be stored in taller jars.
Wide mouth jars are a good option for any pickle, as they are easier to fill.
If you prefer to not use glass jars, you can also use any airtight sealable container, such as a quart deli container or a Pyrex bowl with a well-fitting lid.
Jar lids – You can either use the two-piece lids that come with jars, or plastic reusable jar lids *.
If you are water bath canning however, you must use the two-piece lids, as they are engineered to create a proper seal on canning jars.
Wide-mouth funnel – Using a funnel helps prevent spills when pouring brine into jars. While optional, I find it makes things a lot less messy!
Saucepan – A nonreactive small saucepan * is good for making the brine, which needs to be heated in order to quickly dissolve the salt and sugar.
Some recipes, like pickled red onions, also do well being softened slightly in the hot brine before packing into jars.
Small whisk * – I use a whisk to help the salt and sugar dissolve. A small whisk with a long handle will work fine; there’s no need for a large balloon whisk.
Equipment for water bath canning
Water bath canning can extend the shelf life of pickles and other preserves. When using this method, it’s important to follow all of the instructions for a good seal and long-lasting pickle.
Water bath canning does require some extra equipment to make it easier. However, if you plan to preserve other recipes, it’s a great investment you’ll use for years to come.
Water bath canner * – This is a large pot for boiling jars. Made of enamelware or stainless steel, it often includes a metal rack to put the jars on.
If you don’t have a canner pot, you can use a very large stock pot, provided the jars will be completely covered with water by 1 inch or more when filled.
Jar lifter – Moving the hot jars into and out of the water is incredibly difficult unless you have a jar lifter.
Jar lifters are somewhat like tongs *, but shaped to fit the curve of jars so they can be easily moved. A jar lifter holds on to the jars from the top, allowing you to lower or lift the jars.
Bubble popper – This plastic stick is used for removing air bubbles before placing lids. One end also has marked notches to measure the headspace of the jars.
Many canning kits will come with this tool, but you can also use a wooden chopstick or kitchen dowel instead.
Tongs – Standard tongs are helpful for moving sterilized jars from water to the work surface.
Lid lifter – (Optional) A plastic stick with a magnet at the end, a lid lifter is ideal for removing lids from hot water. While no longer strictly necessary in many recipes, warming the lids helps soften the glue for sealing.
Jar wrench – (Optional) Many canning kits contain a jar wrench. This tool closes around the lid band and allows you to tighten the band on hot jars.
However, because jar bands only need to screwed on to fingertip tight (i.e. until the band stops moving freely), you don’t need this tool unless you have limited mobility in your hands.
A canning kit will include all of the tools above. You can also find kits that include the canning pot.
 Buy Now →
 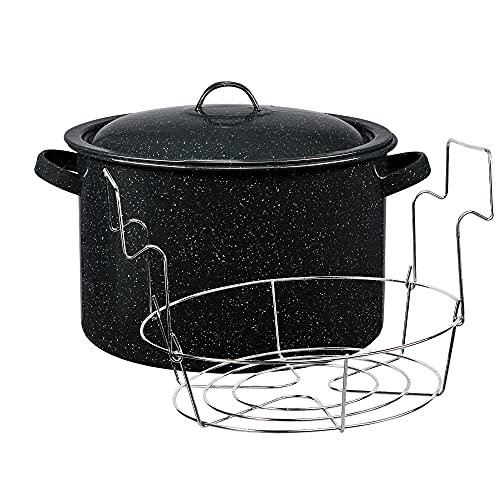 Buy Now →
  Buy Now →
 *
How to make a refrigerator pickle
Gather the ingredients and equipment. Make sure your jars or chosen pickle container are clean.
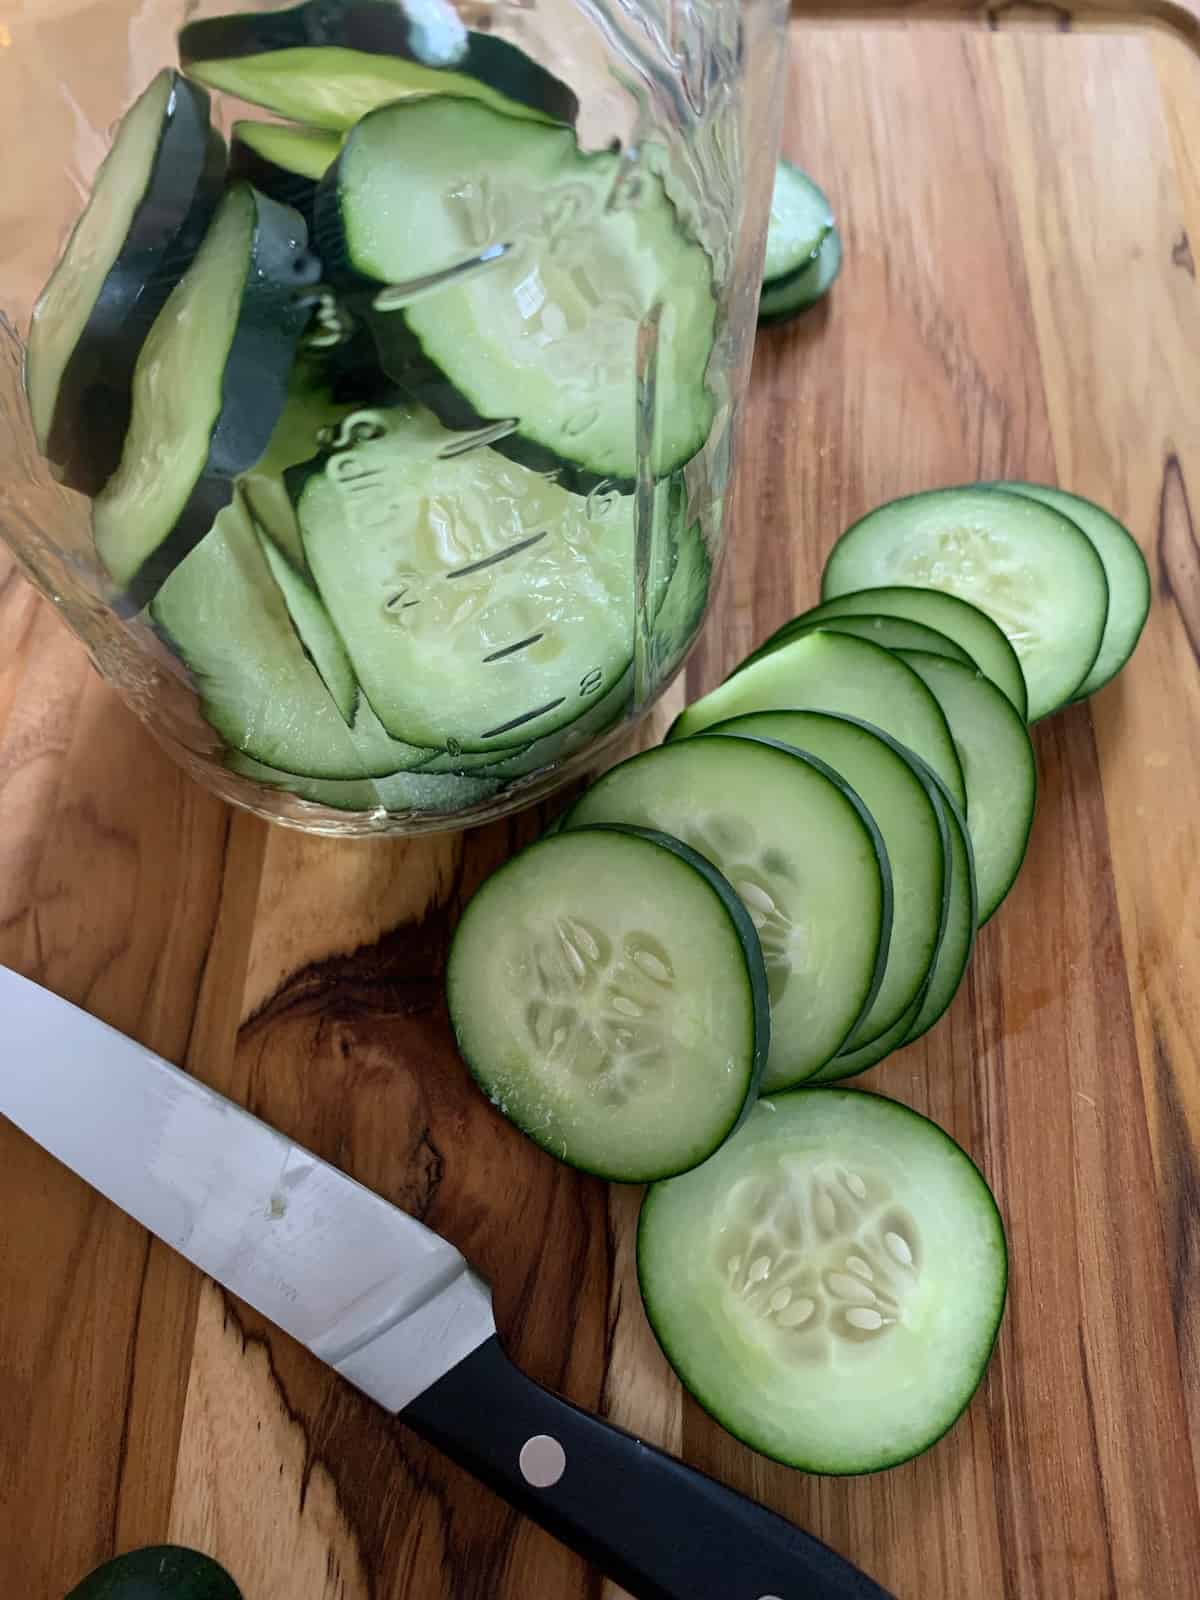
Slice the cucumber into rounds or spears. For other vegetables, cut to desired shape and size, making sure they fit your jars or container.
Want to save this recipe for later?
Stuff the veggies and spices into the jar, dividing equally between multiple if needed.
Pack the vegetables in tightly but carefully to not break the pieces.
Packing them tightly will allow you to get as many pickles as possible in the jar and prevent the pickles from floating once the brine is added.
Once you add the hot brine, they will soften slightly and you’ll be able to add more slices as needed to fill any empty space.
Make your brine. Combine the vinegar, water, pickling salt, and sugar (if using) in a saucepan.
Set over high heat and bring to a boil. Whisk or stir to dissolve the salt and sugar.
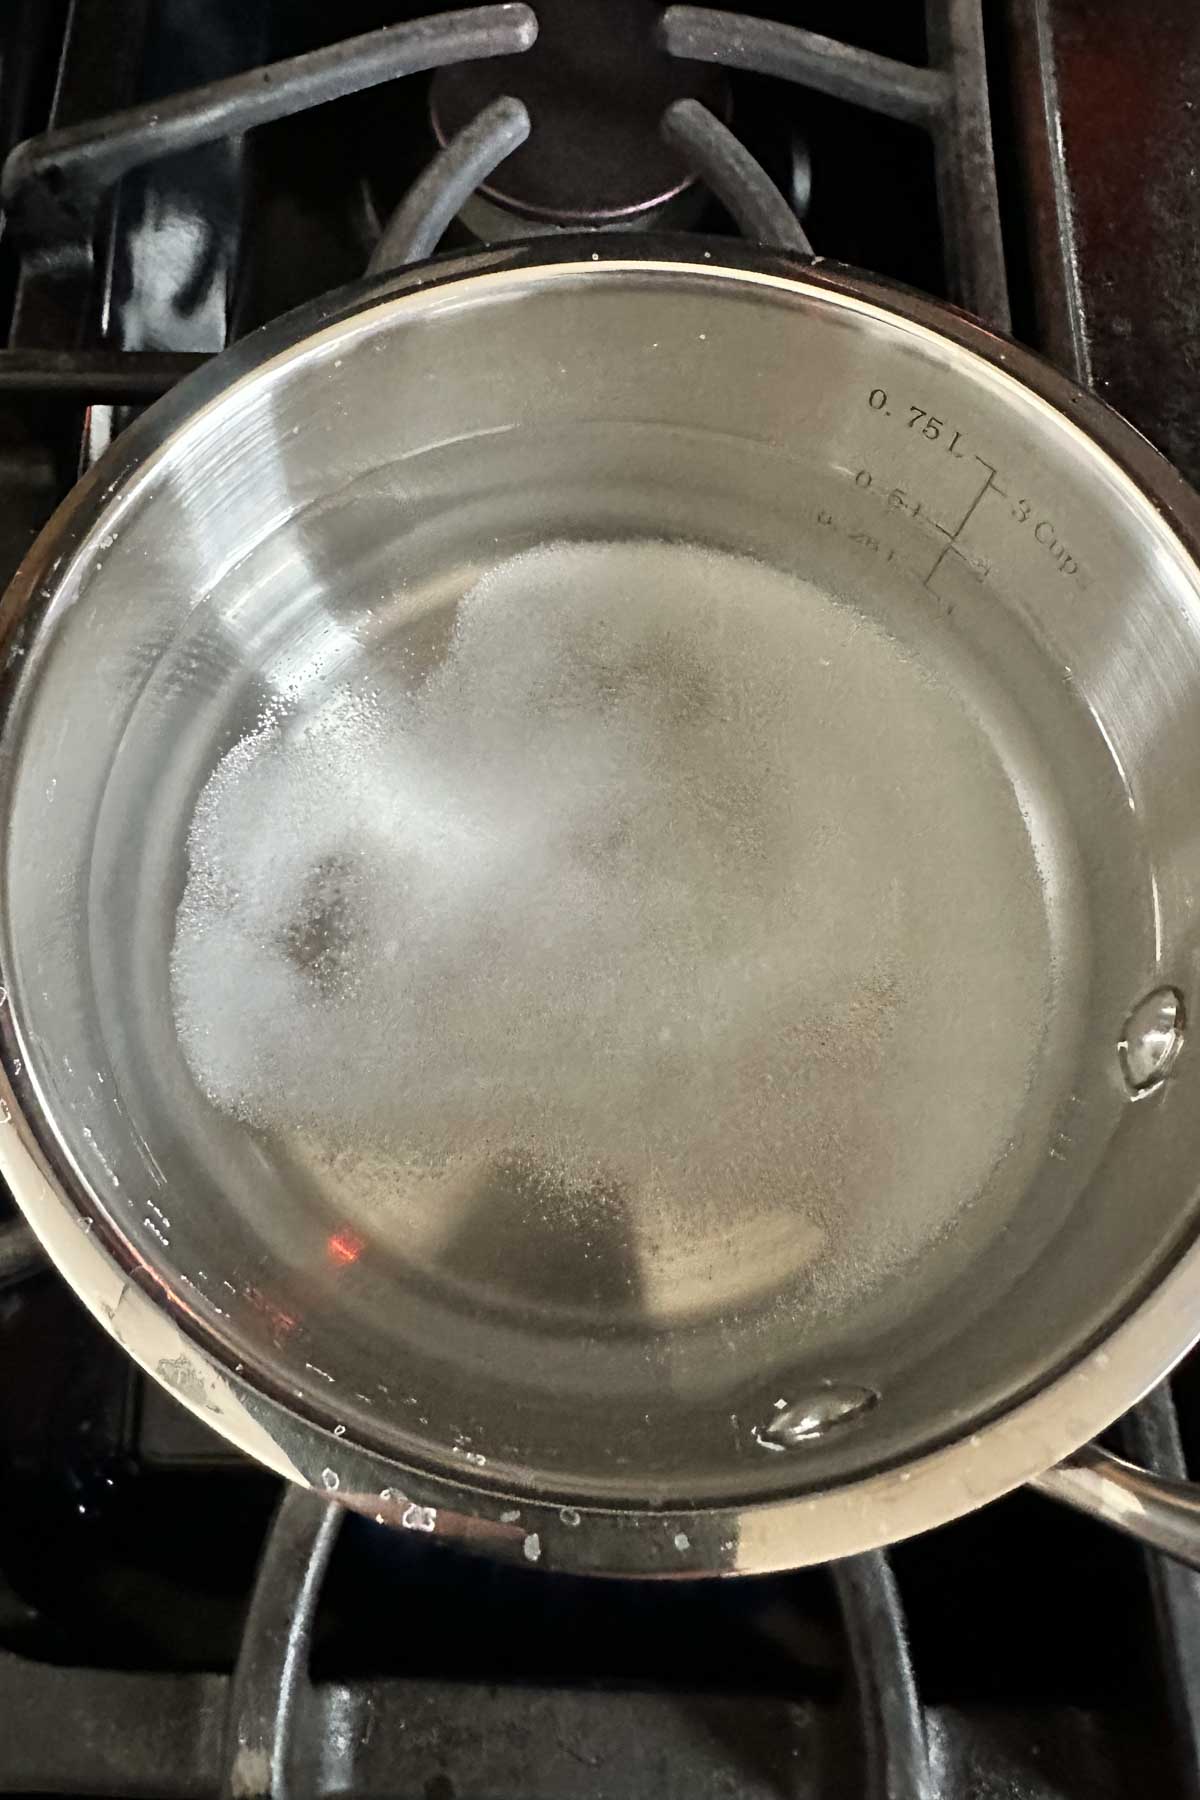
Once completely dissolved, remove from the heat.
Set your jars on a kitchen towel to protect from splashes and insulate between the jar and kitchen counter.
Place a funnel in the jar (optional) and carefully pour the brine into the jar. Fill so that the vegetables are completely covered, but make sure to leave ¼-inch of space at the top of the jar.
You may have extra brine; this is fine.
Use a bubble popper, chopstick, or kitchen dowel to gently press trapped air bubbles to the surface. Simply slide it down into the side of the jar and gently press toward the center.

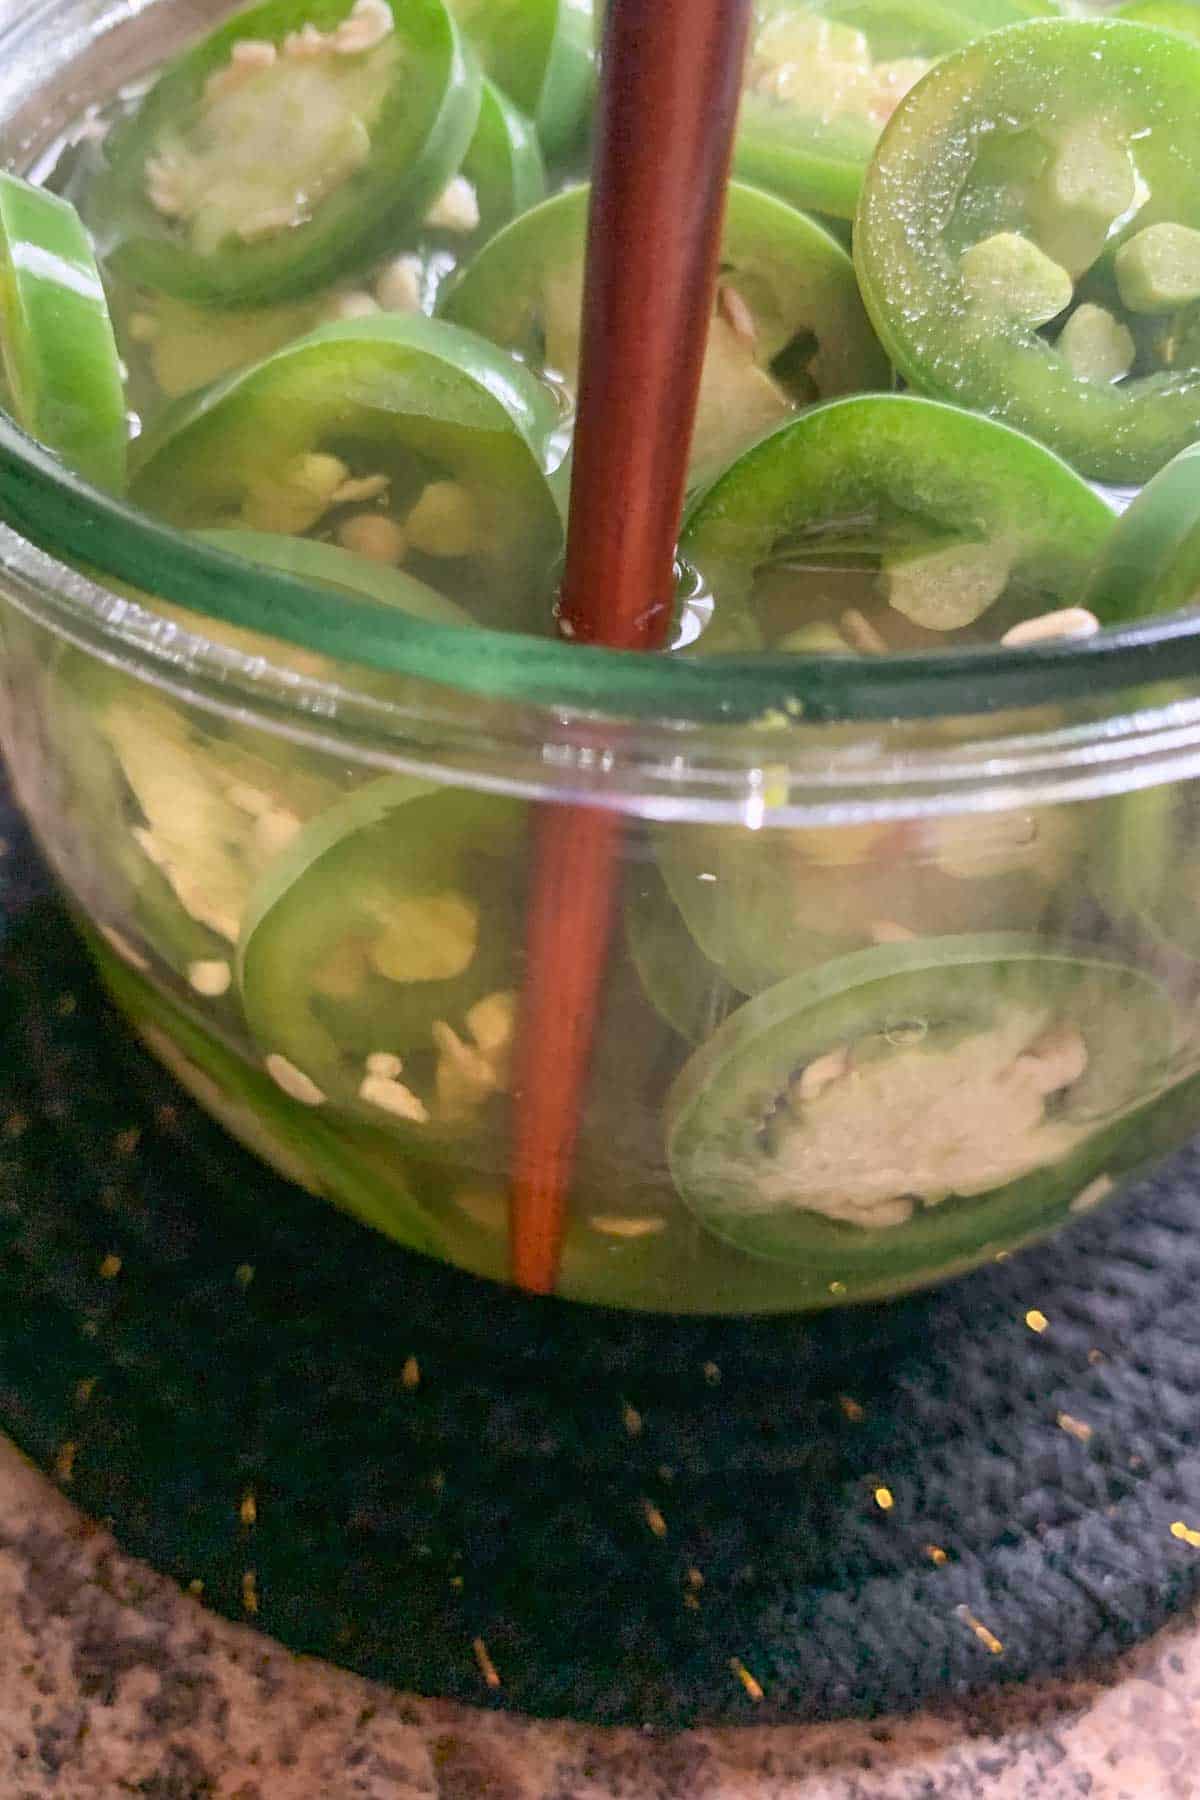
Removing the air bubbles helps the brine completely fill the jars. If needed, add more brine at this point to cover the vegetables and maintain a headspace of ¼ inch.
Discard any extra brine.
Place lids onto the jars and let the jars cool for about 2 hours, or until room temperature.
Ensure the lid is on tightly and transfer the jar(s) to the refrigerator.
I recommend letting the pickles chill for at least 24 hours before eating. This will help the flavors meld and give you the best taste!
How to make canned pickles
To make canned pickles, you first need to prepare the equipment.
Fill a water bath canner or large pot with water, cover, and set to boiling.
Ensure your canning jars are clean and sanitized, unscrewing the rings and removing the lids if they are new. You can quickly sanitize the jars by putting them into the boiling water for 5 minutes.
Set the jars on a clean kitchen towel with the lids and bands nearby. Keep the water boiling while you prepare the recipe.
Proceed with the recipe for making the pickles.
Once you have poured the brine into the jars, place the lids on the jars and screw on bands fingertip tight.
remember
If you have any jars that are not completely filled, do not process in the canner. Let cool and store them in the refrigerator instead.
Using a jar lifter, carefully lower the filled jars into the water bath canner, making sure there is at least 1 inch of water covering the jars.
Place the lid on the pot and return to a boil. Boil for 10 minutes, then turn off the heat and remove the lid.


Use the jar lifter again to carefully remove the jars to the towel-lined countertop.
Let the jars cool, undisturbed, for 24 hours. After 24 hours, check the lids for a proper seal, label, and transfer to a cool, dark place, such as a pantry.

Recipe variations
After you’ve made your first pickle, chances are you’ll want to try pickling everything!
You can always make recipes spicier by adding crushed red chile pepper or a small hot pepper, or sweeter by adding granulated sugar to the pickle brine.
Vegetables can be combined in pickles as well, creating pickle mixes like Italian giardiniera or Mexican escabeche.
I recommend making small batches of pickles to test out your favorite flavor combinations before moving on to larger batches.
Give these recipes a try:
- Pickled Cauliflower
- Pickled Green Beans
- Pickled Carrots
- Pickled Red Onion
- Pickled Radishes
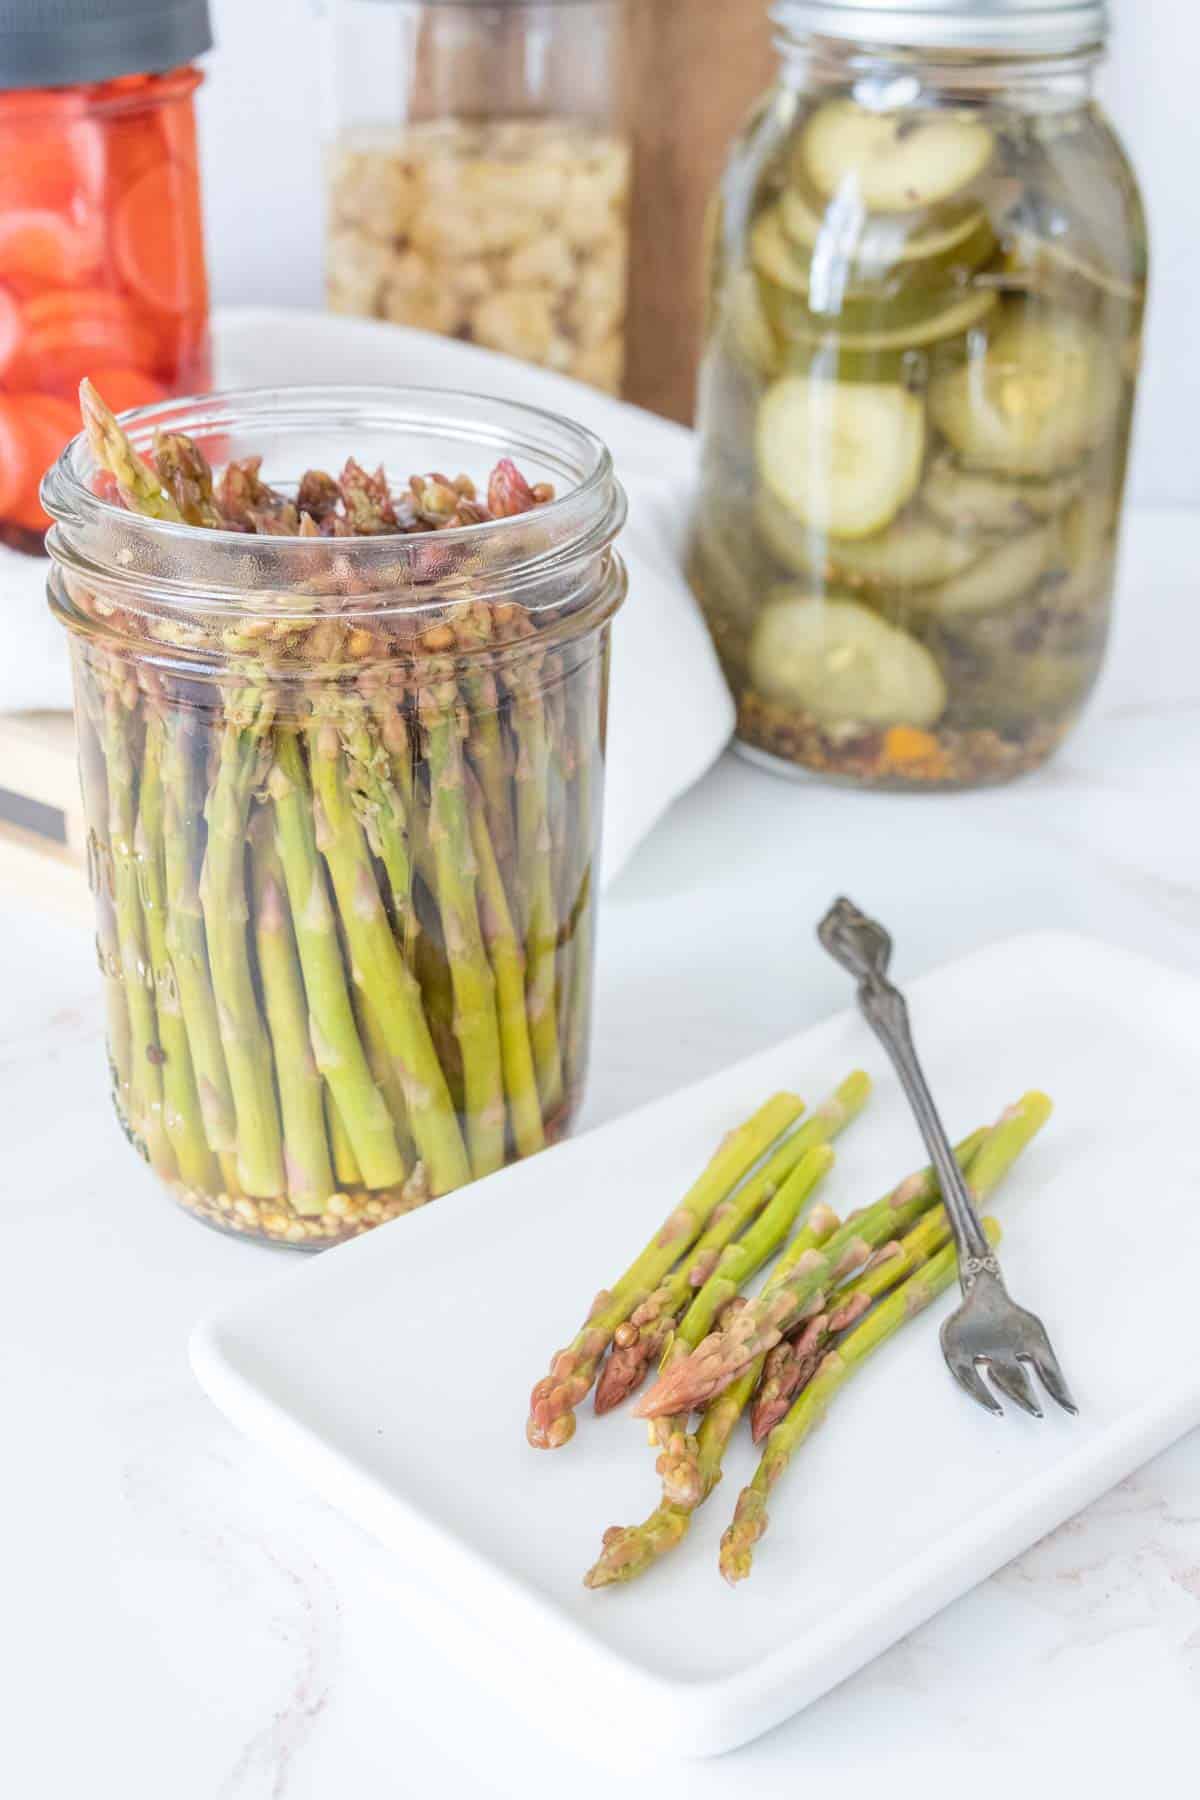
- Pickled Asparagus
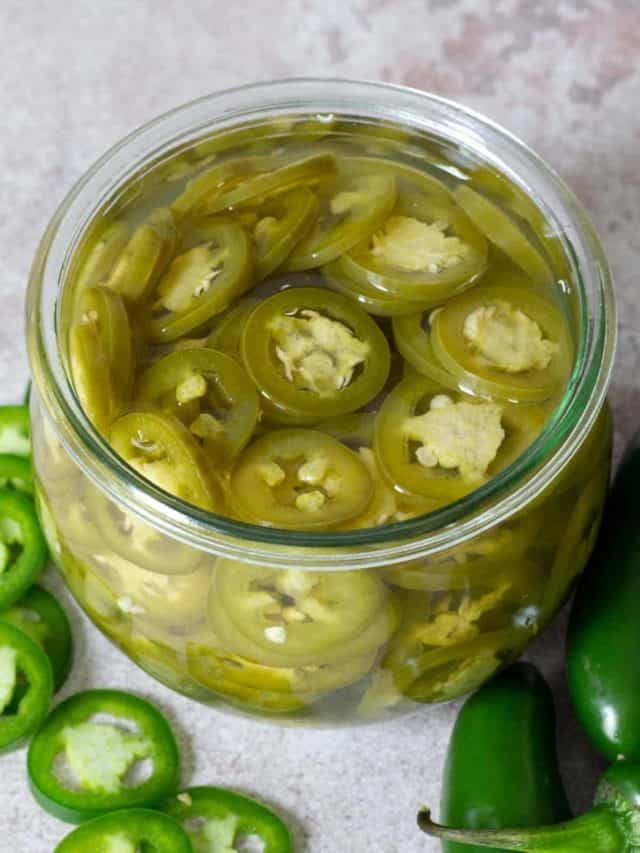
- Pickled Jalapeños
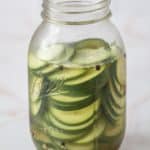
- Quick Pickled Cucumbers
- Pickled Beets
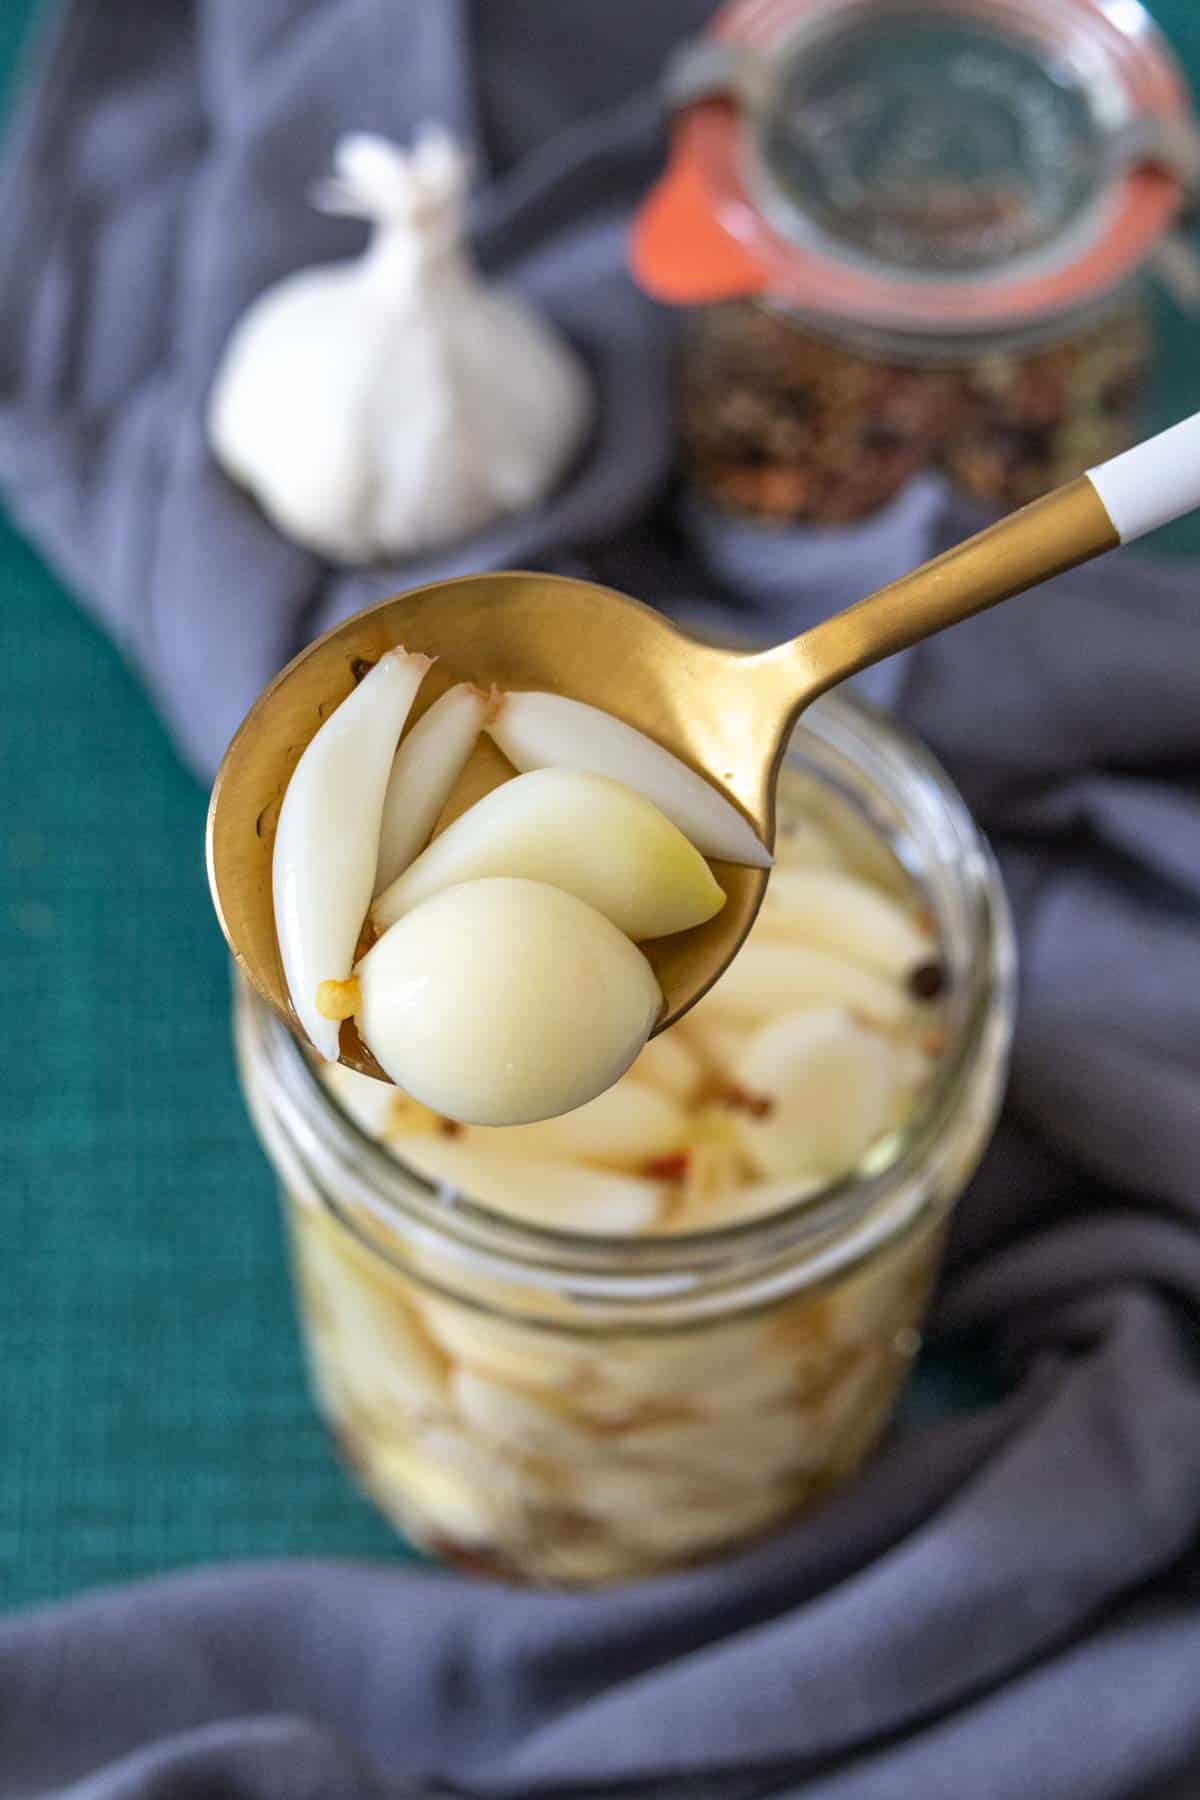
- Pickled Garlic
Important tips
Don’t screw the lid rings on too tightly, which can prevent air from escaping the jar and cause the seal to fail. The rings should not be excessively tightened, only turned until they stop moving.
Don’t reduce the vinegar, especially if you are canning. In order to have a safe pickle, vinegar needs to be 50% or more of the liquid component of the brine. Less vinegar in a refrigerator pickle would result in a less tart, pickly flavor.
Some pickles will change color. Red onions and sliced red radishes will turn pink when pickled. Garlic cloves can also take on a blue-green tint. Don’t be alarmed: This is a natural and simple chemical reaction with the vinegar and garlic components.
Experiment with different flavor combinations like Indian-inspired spice mixes, different vinegars, and more.
Don’t store unprocessed or unsealed jars in the pantry. Jars that have been opened or do not have a proper seal must be stored in the refrigerator.

FAQ
How to Make Pickles
Ingredients
- 4 cloves garlic, slightly crushed
- 4 teaspoons dill seed
- 1/2 teaspoon crushed red chile flakes *
- 2 pounds fresh vegetables, such as cucumbers, green beans, asparagus, carrots, or cauliflower
- 2 ½ cups water
- 2 ½ cups distilled white vinegar
- ¼ cup pickling salt
Directions
- If using a water bath canner, fill with water, cover, and set to boil while you prepare the rest of the recipe.
- Divide garlic, dill seed, and chile flakes among 4 pint jars *.4 cloves garlic, 4 teaspoons dill seed, 1/2 teaspoon crushed red chile flakes
- Trim vegetables to fit inside the jars, then pack tightly into jars. Set aside any extra vegetables.2 pounds fresh vegetables
- In a saucepan over medium-high heat, bring water, vinegar, and pickling salt to a boil, stirring to dissolve salt.2 ½ cups water, 2 ½ cups distilled white vinegar, ¼ cup pickling salt
- Carefully pour brine into prepared jars, leaving ¼-inch space at the top. Use a chopstick or dowel to gently remove any air bubbles by inserting along the side of the jar and pressing toward the middle. Add reserved vegetables or brine as needed. Add lids and screw on bands fingertip tight.
IF PRESERVING
- Carefully lower jars into boiling water bath. Cover and boil 5 to 10 minutes, depending on the vegetable used, then turn off heat and wait 5 minutes before removing jars to towel-lined countertop. Let jars rest 24 hours before moving to ensure seal. Store any unsealed jars in the refrigerator.
IF NOT PRESERVING
- Let jars cool to room temperature, then transfer to the refrigerator.
- Do not store unpreserved jars in the pantry.
Notes
- Makes 4 pint jars.
- If reducing or doubling this recipe, make sure to keep the brine at least 50% vinegar.
- If you are not preserving in a water bath canner, store in the refrigerator.
Want to save this recipe for later?
Recommended Products
- 4 pint canning jars
Nutrition
Nutrition information is provided as a courtesy and is an estimate based on online calculators. Any nutritional information found on Stetted should be used as a general guideline only.
You might also like:


About Megan
I learned how to cook by exploring seasonal ingredients, and you can too! Meal time shouldn’t be stressful or complicated, and with fresh ingredients and easy methods, I’m here to help you enjoy the time spent in the kitchen. Read more…